Little Pink Monsters

  • tutorials
  • Recipes
  • Contact
  • About Me
  • facebook
  • twitter
  • pinterest
  • instagram
  • rss

We are siameeeese!

by Natasha on November 1, 2012 in tutorials

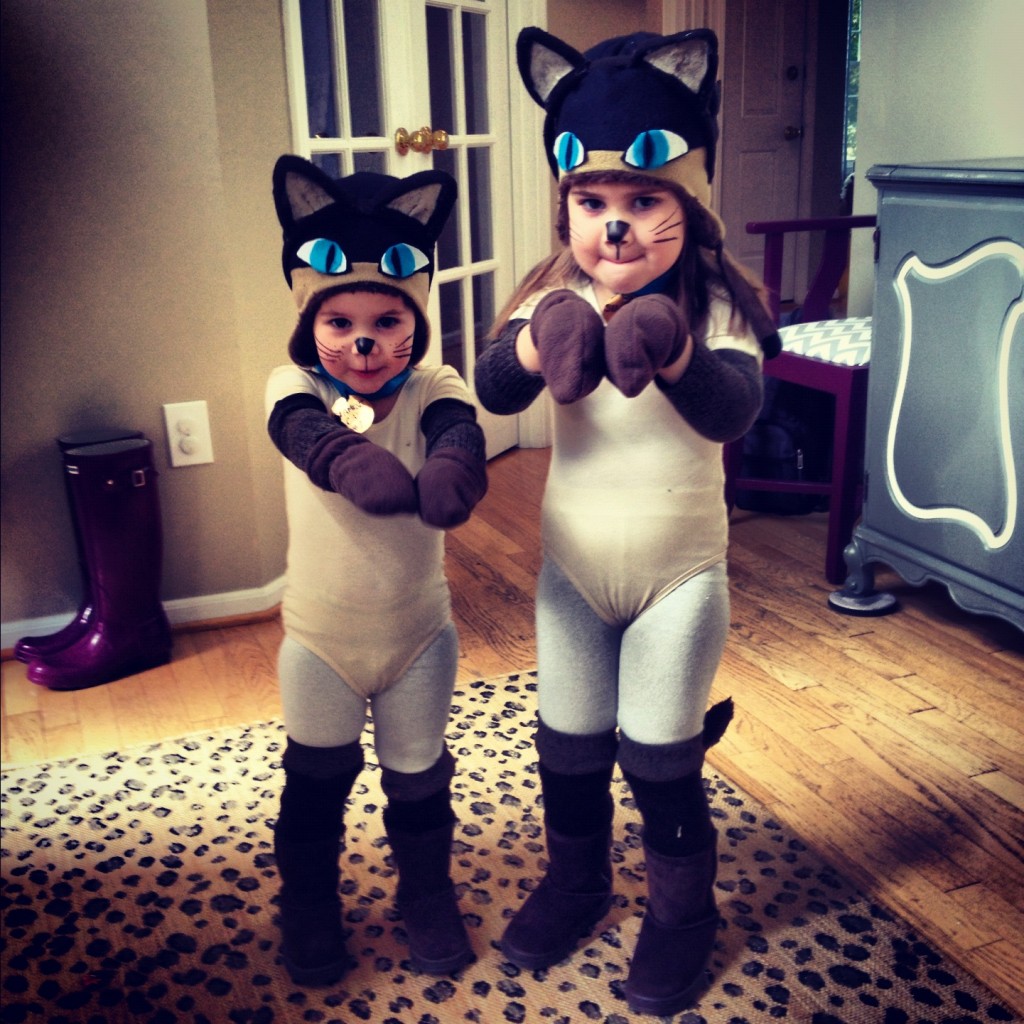
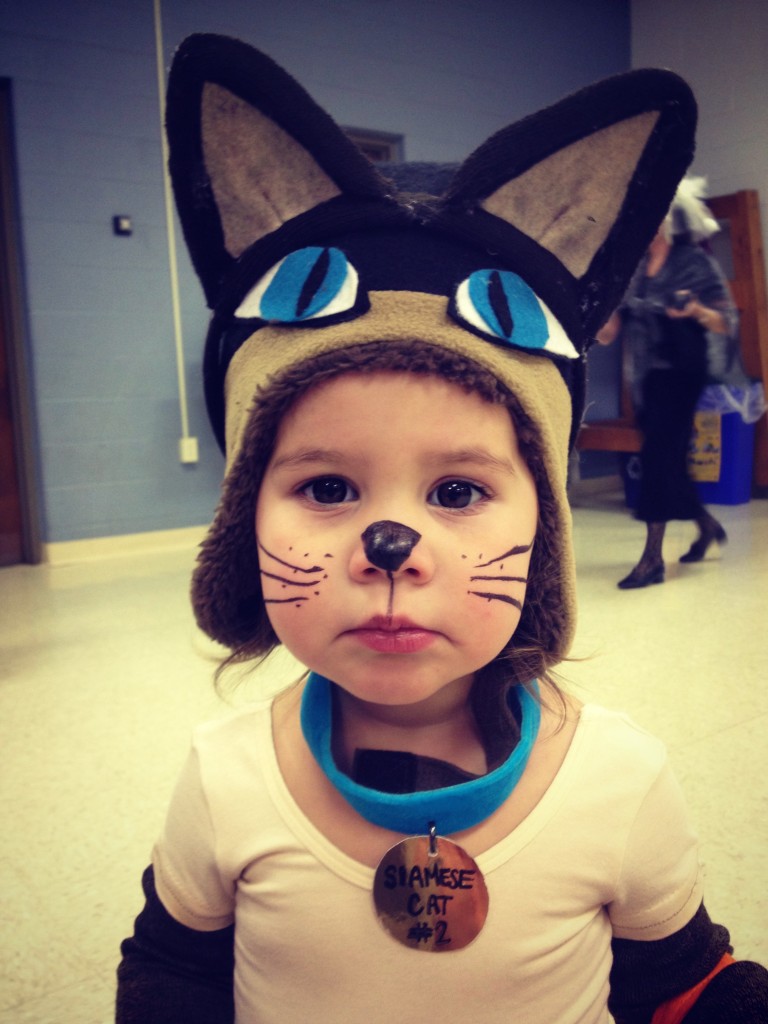
My girls are OBSESSED with watching the Siamese Cats (“Si” and “Am” if you didn’t know) from Lady & the Tramp over and over and over…it was actually my favorite when I was a kid too. When they decided that’s what they wanted to be for Halloween I was at first extatic that a.) Sam was willing to be something other than a princess for the first time in her life & b.) they would be twinsies, so cute right?

Then I realized that I had absolutely no idea how to make a Siamese Cat costume.

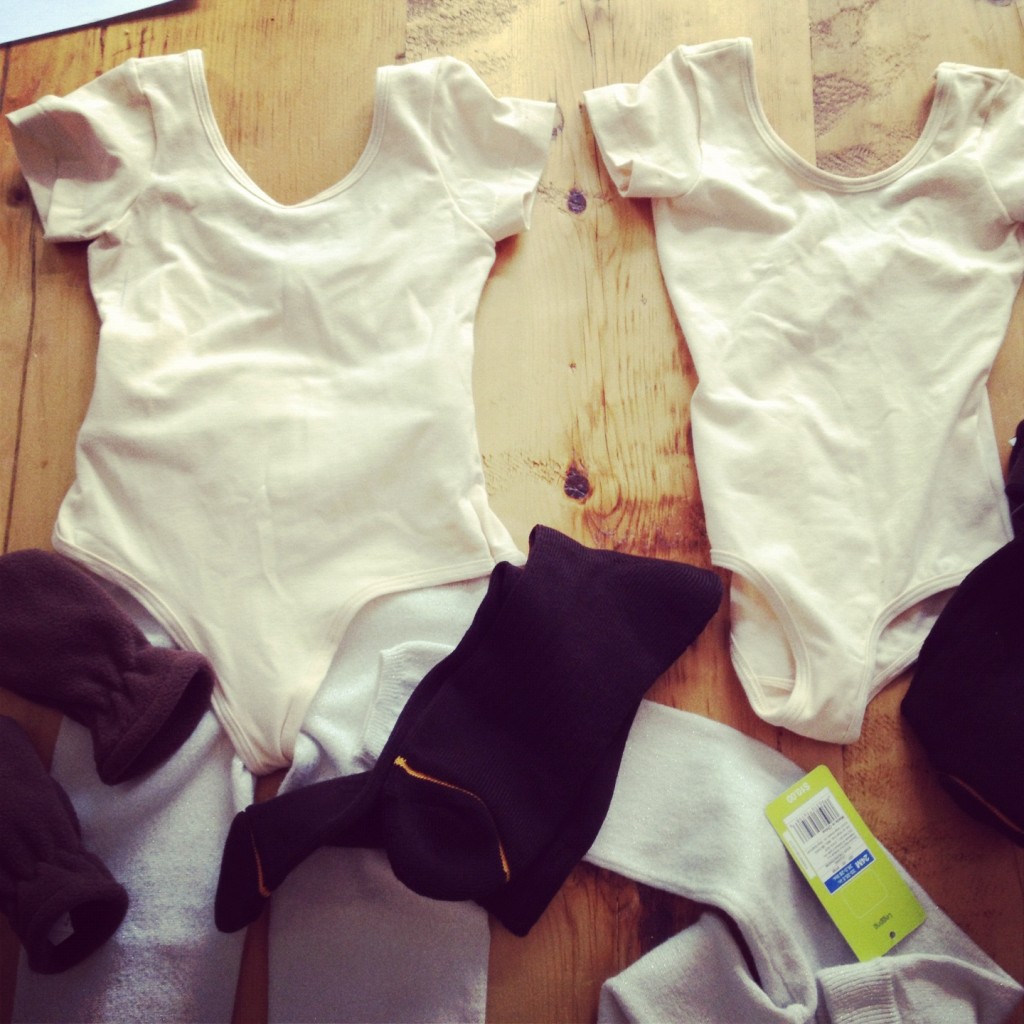
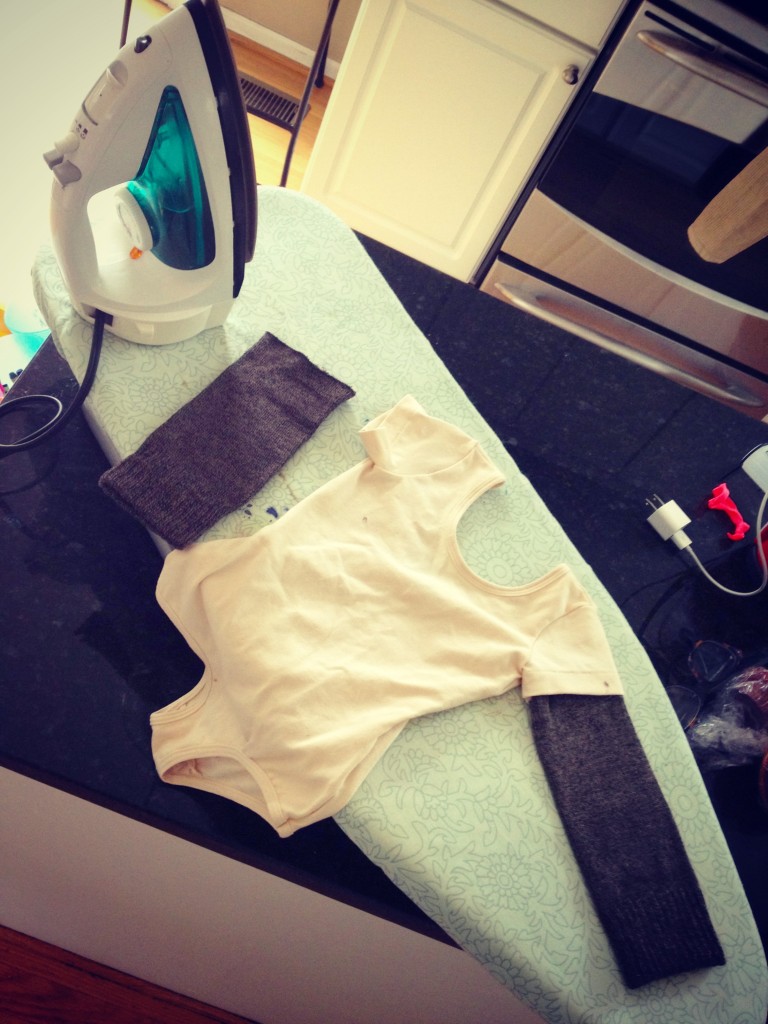
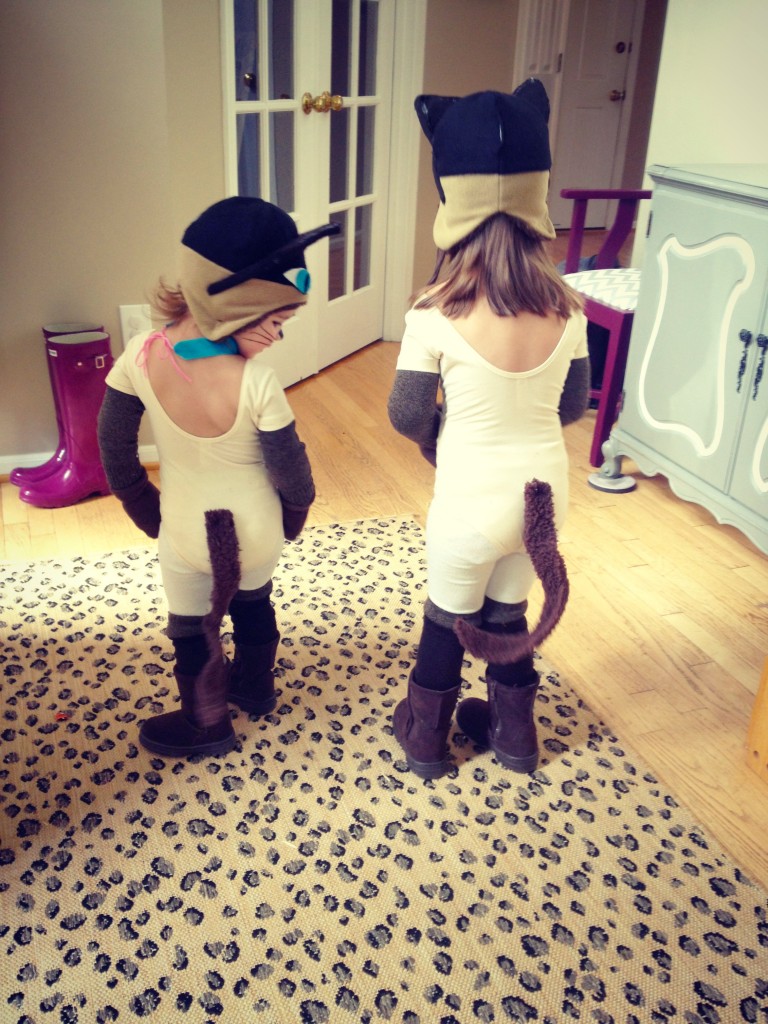
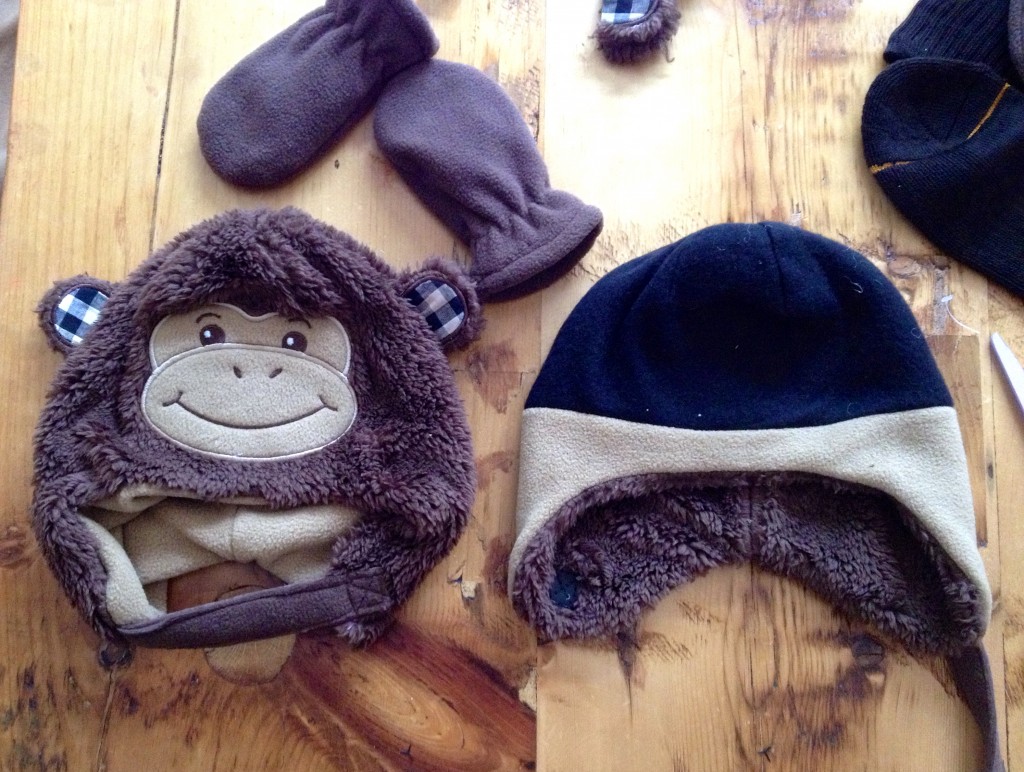
A few weeks ago I found the nude leotards at American Apparel & kind of built the costumes from there. I’ve been in a non-sewing mood lately (gasp!) so I did as much with already made items & a hot glue gun as I could. The hats were teddy bear fuzzy hats from Target turned inside out, ears were made with hot glue & brown men’s socks, the tails were fuzzy fabric glued around pipe cleaners so they’d stand up, the sleeves were men’s tube socks cut off & sewn onto the leotard sleeves & the legwarmers were also made from men’s brown socks using this babylegs tutorial. Here are a few pics from the steps to give you the gist…The ears were on a headband so that they could take the hats off in school and still maintain their ‘catness’. I used the long end of the sock base & some hot glue to cover a plastic headband & then sandwiched the headband with the sock heel…To add some support I put a triangle piece of felt in the sock heel ear (the blue piece) before gluing the two heel pieces together. Next I used a piece of tan felt for the inner ear. I cut a small slit in the bottom of the triangle and then glued that slit shut to create some some curved shape to the ear. Then I glued the tan pieces right onto each brown ear.
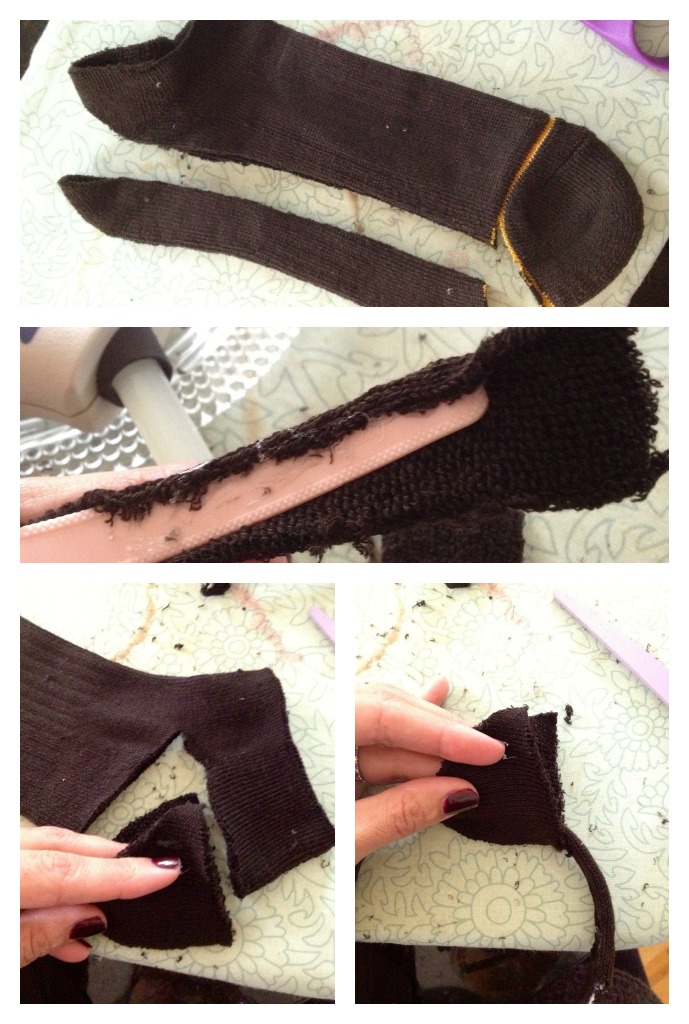
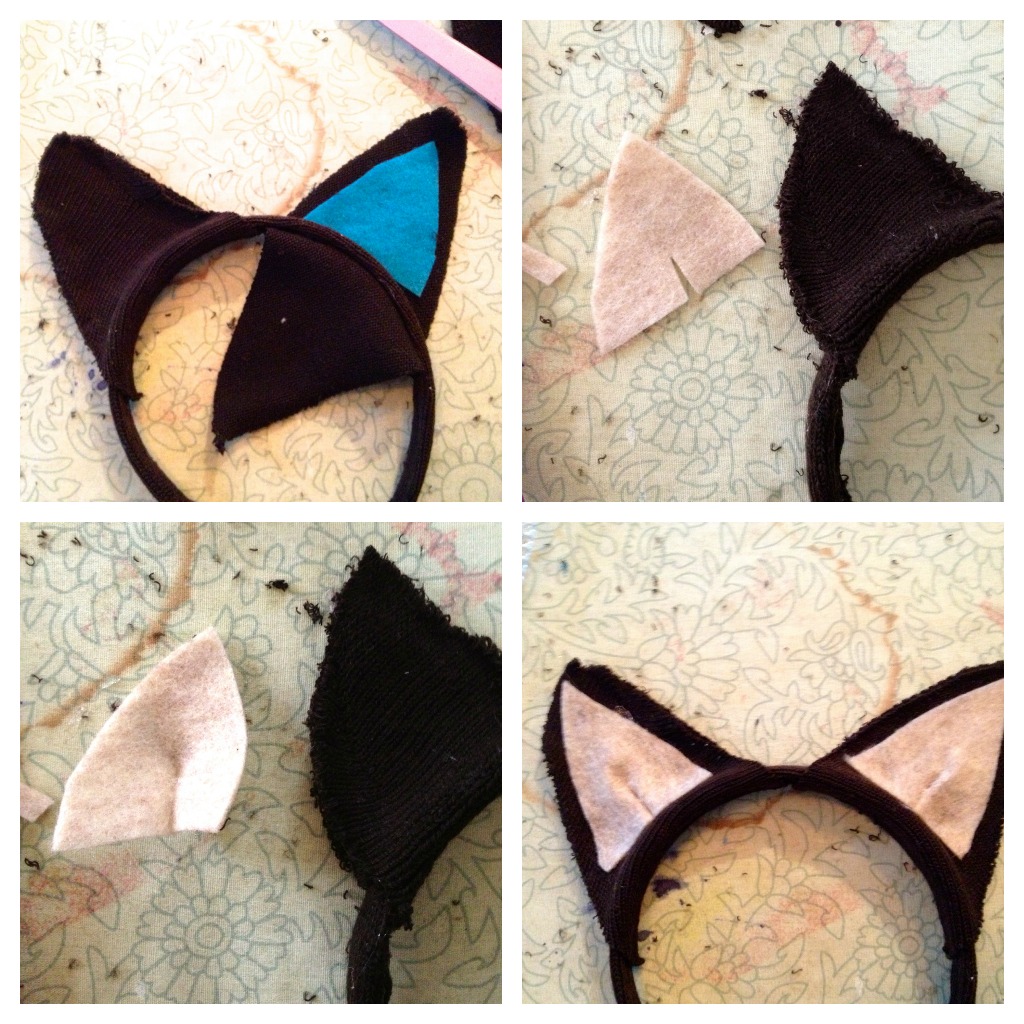
(ugh, remind me to buy a new ironing board cover. gross.)

Finally to cover the raw edge around the ear (knit socks fray like mad after you cut them) I cut a long piece of sock & then rolled it in on itself with a bit of hot glue. I then glued my tube around the perimeter of the ear. I realize this is kind of hard to envision but my advice is just start fiddling with it, let the glue gun lead you my friend.

I took a ton of pictures of making the eyes that I glued onto the hat & have no idea where they went. They were on my cell phone and now they’re not. Stupid technology. That’s ok, basically I looked at a picture of the Siamese Cats & cut out felt shapes to create the eyes. I made them big & in your face because they’re basically the only thing that separates their costume from any other cat costume. They give it personality.

So did anyone else make their kid’s costume(s) this year? Mine was the only homemade costume I saw at my kid’s school & I’m starting to wonder if it’s just so passe to go homemade for Halloween…

PS- Here’s a little nugget from me to you…

If you use your waterproof smudgeproof liquid eyeliner to draw a nose & whiskers on your kid’s face it will not wash off. It will still be there the next day when your kids go to school & people will think you don’t bathe your children. Which in all honesty you didn’t bathe your kids last night. Teenage boys kept ringing your doorbell well past 8pm and they didn’t even bother wearing costumes which is ridiculous, it’s not “FREE CANDY NIGHT FOR EVERYONE WHO’S ALREADY HIT PUBERTY”. Then you realize you’ve become the cranky old woman who keeps the kid’s ball that rolled in her yard.

Inspired? Share the Love...
Share on Facebook
Facebook
Tweet about this on Twitter
Twitter
Pin on Pinterest
Pinterest
Google+
Google+

{ }

Bedroom Sheet into a Tent Reading Nook

by Natasha on October 24, 2012 in tutorials

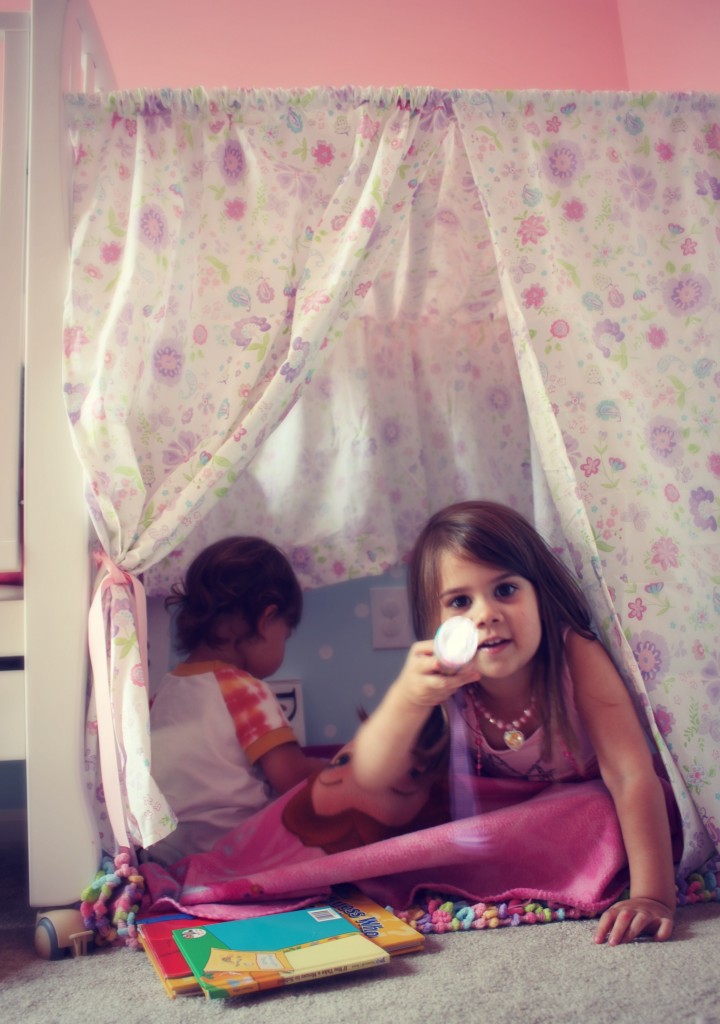
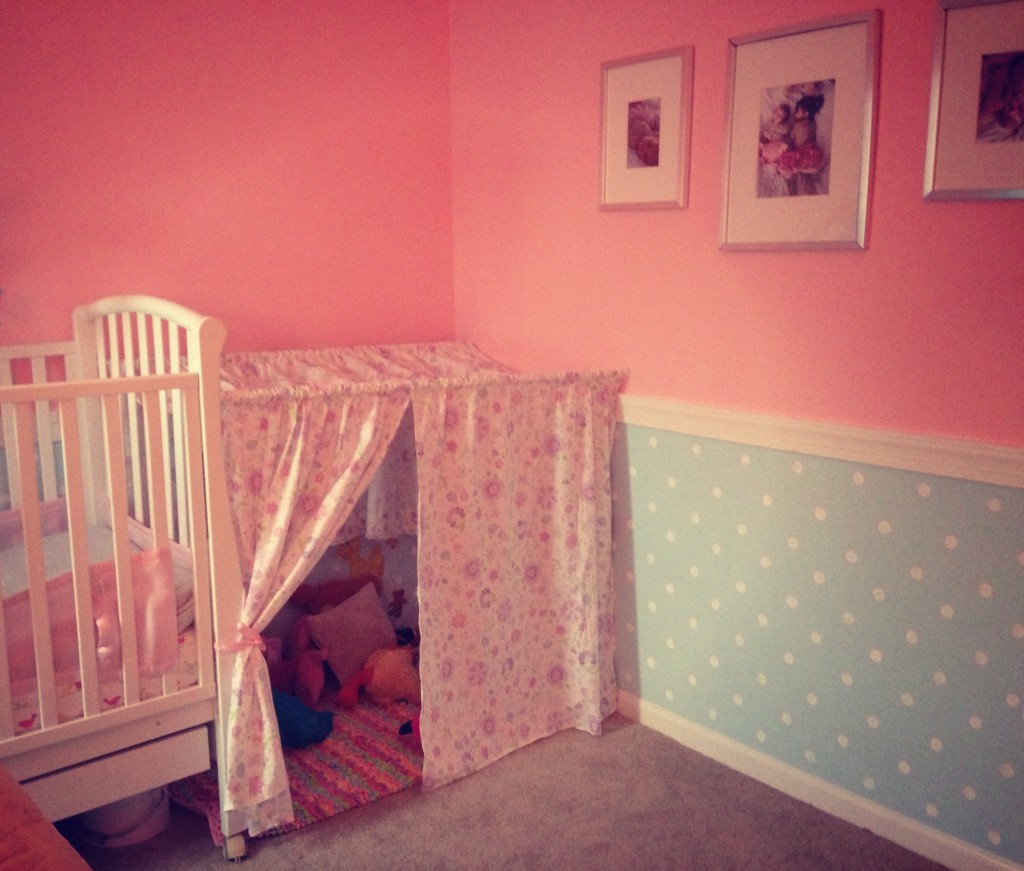
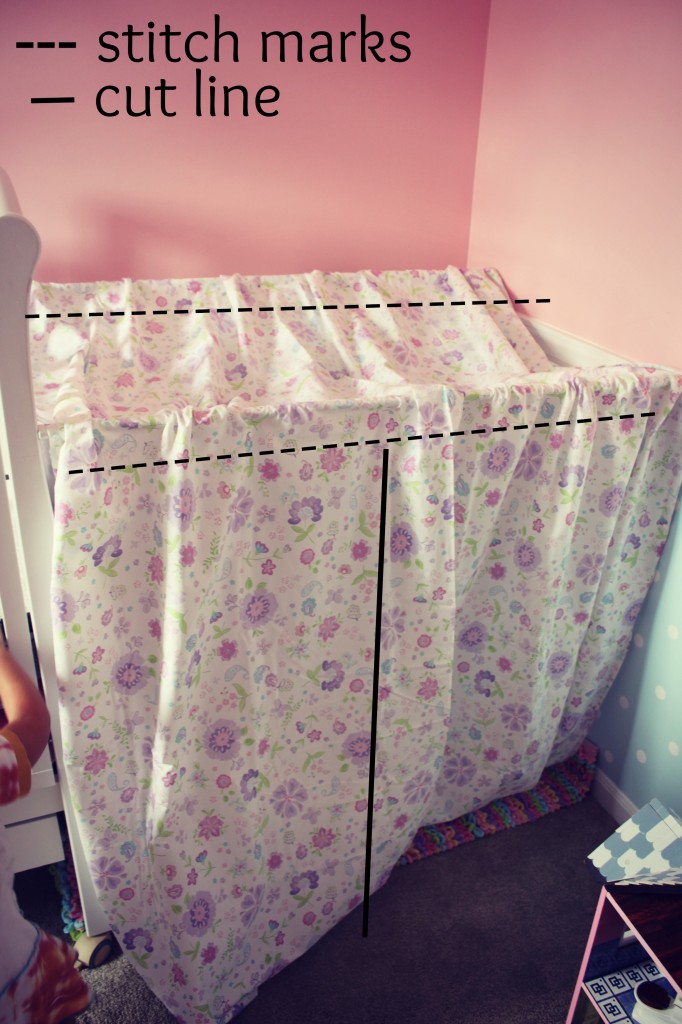
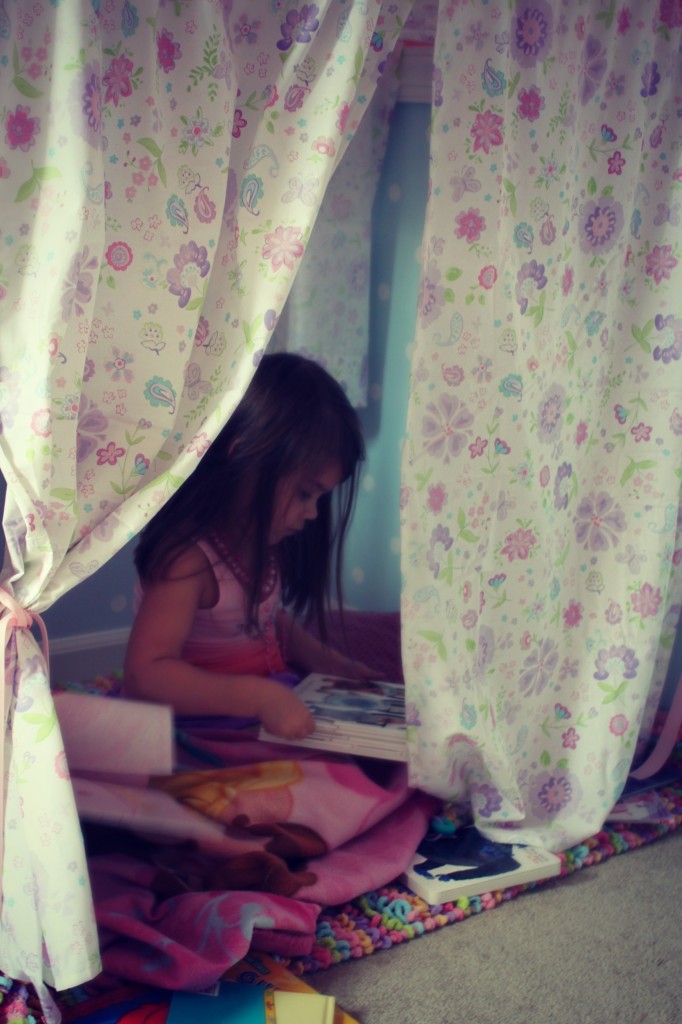
I’ve been holding this idea in the back of my head for awhile now, I think I first saw it on Apartment Therapy. Boy oh boy was it ever worth taking the time to put up, which was all of 1 hour of work & $5 of supplies, peanuts people. The girls LOVE LOVE LOVE it! I’m so excited for them to finally start using Sophie’s room to play in, up until now it’s been the nursery but this definitely gives her some big girl room credibility!

(polka dot wall tutorial here)

On the inside of the tent I added a fun cozy rug to differentiate the space & make it feel like it is it’s own room. I also have a little basket filled with favorite books & flashlights as well as plenty of comfy pillows & cozy stuffed animals. Come to think of it, I want a cozy little tent to retreat to! Problem is they’d find me…they always find me.

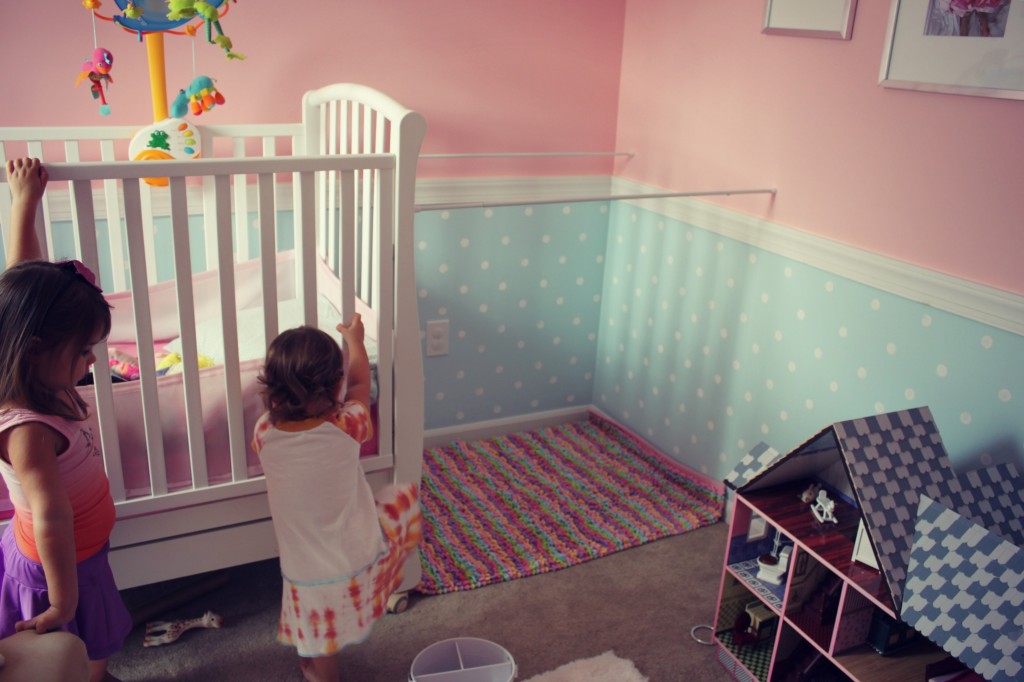
This is a great beginner’s project, oh so simple.I pushed Soph’s crib towards the left side of the room to create a nice 4′ space between her crib and the far wall. Then I placed two tension rods between the posts on her crib and the wall, this creates the tent structure. I chose to then drape my sheet over the rods & then pin a casing for the rods to slip through. You could also just drape the sheet over the rods or even safety pin it in place but I wanted something a little sturdier. I stitched a straight line where I wanted my casings to be. Next I cut a slit for the tent opening & hemmed the edges down using iron on hem tape to prevent fraying. Last step, add some ribbon tie-backs to your wall or the crib if you like. I used one of those command hooks on the crib to attach the ribbon.

So easy, only thing I’m left to wonder is why the heck didn’t I do this sooner?!

*Don’t be surprised if your tent does fall down from time to time. Since it’s held up by a tension rod that’s putting pressure on a crib with wheels it does fall if the crib is moved at all. No worries though, no one gets hurt from a sheet falling on their head. (:

Inspired? Share the Love...
Share on Facebook
Facebook
Tweet about this on Twitter
Twitter
Pin on Pinterest
Pinterest
Google+
Google+

{ }

Instagram Sticker Projects

by Natasha on October 18, 2012 in tutorials

Do you Instagram? Do you have an Instagram obsession like I do? Then be prepared to fall in major love with Prinstagram. (Prinstagram did not sponsor this post whatsoever, in fact, they don’t even know I exist, I’m just really happy with my order & wanted to share!) (also find me on Instagram at Samstermommy)

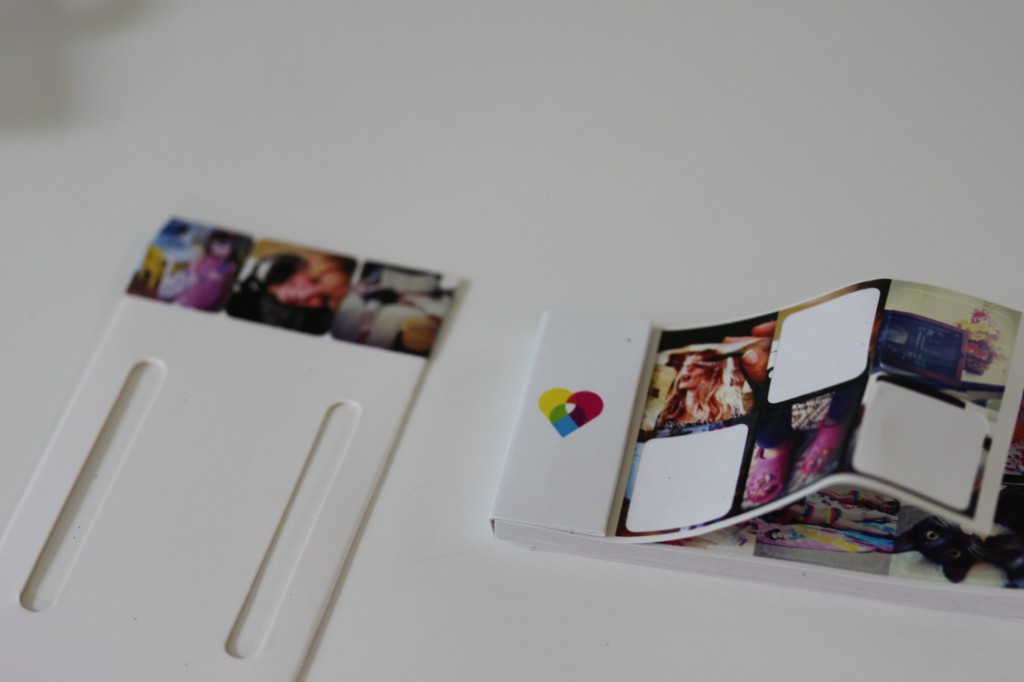
I’ve been digging around for ways to print my Instagram images & I’m so happy I stumbled upon Prinstagram. I was able to easily upload pictures directly from my Instagram account & ordered two books of Instagram stickers for $10! That 252 custom stickers for cheaper than a trip to Chickfila. I also ordered some 4×4 prints that I’m very happy with the quality of for only $12 for 24 prints. Next I’ll be ordering the posters, I have a great idea for a piece of mega art to make with those!

Here’s what I’ve done so far with my stickers…

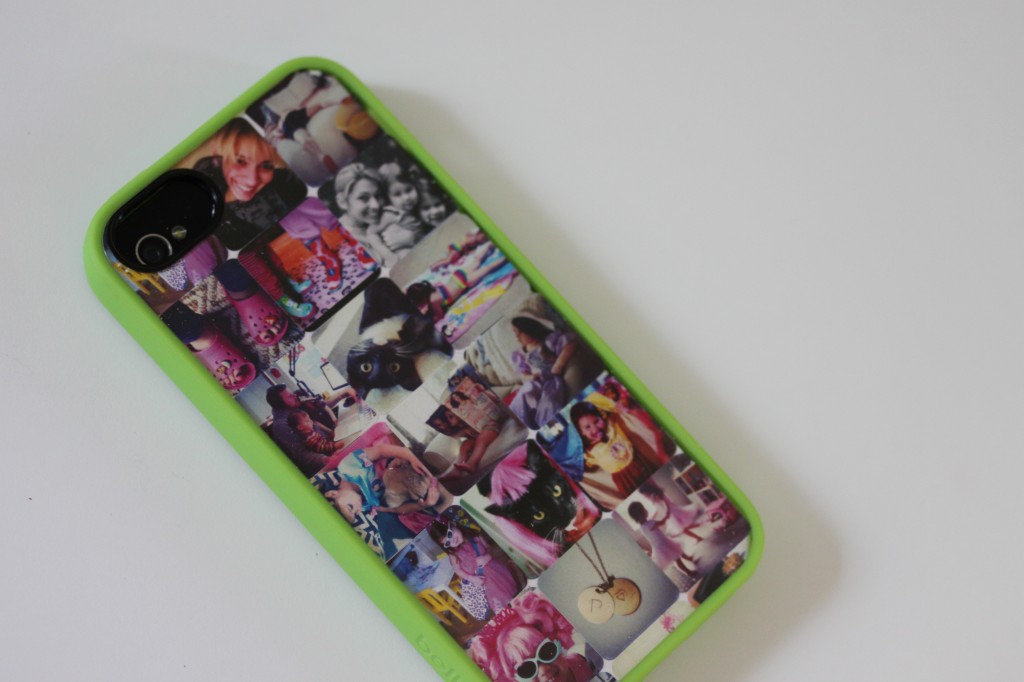
An iphone case…

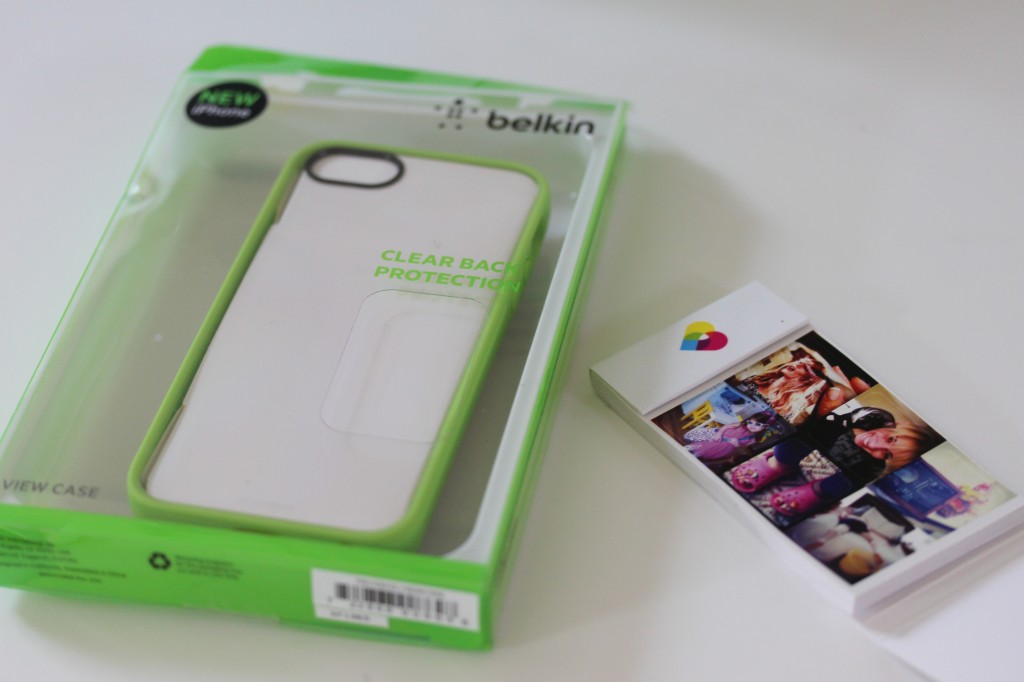
I used a clear back belkin case (mine was from Target but I’m going to buy this clear case
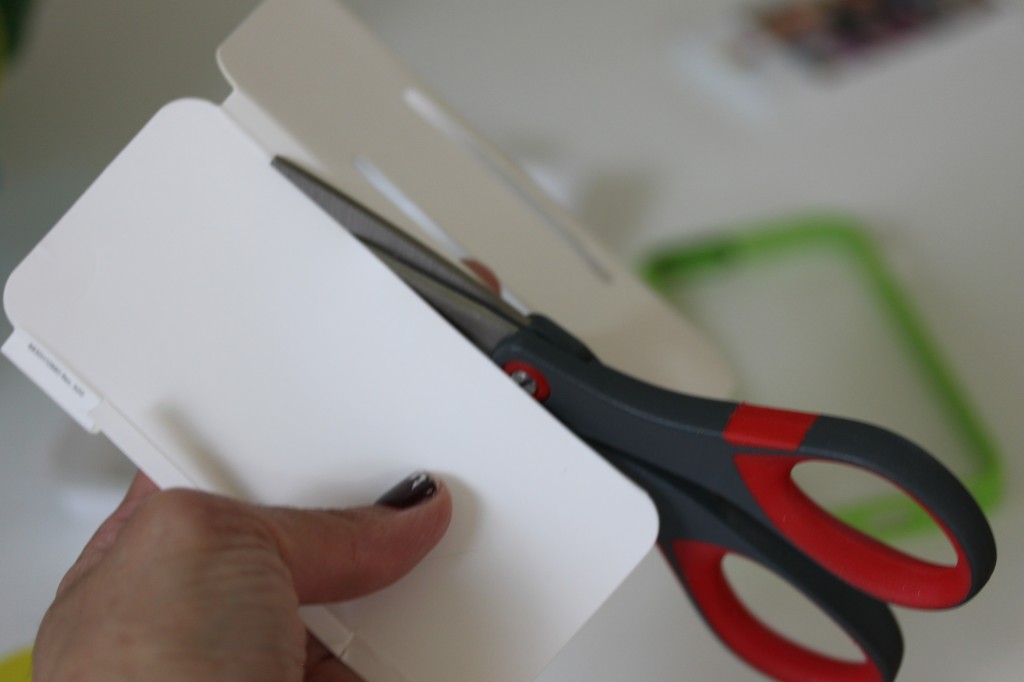
next) & applied the stickers to the cardboard insert that came with the packaging. Easy enough.

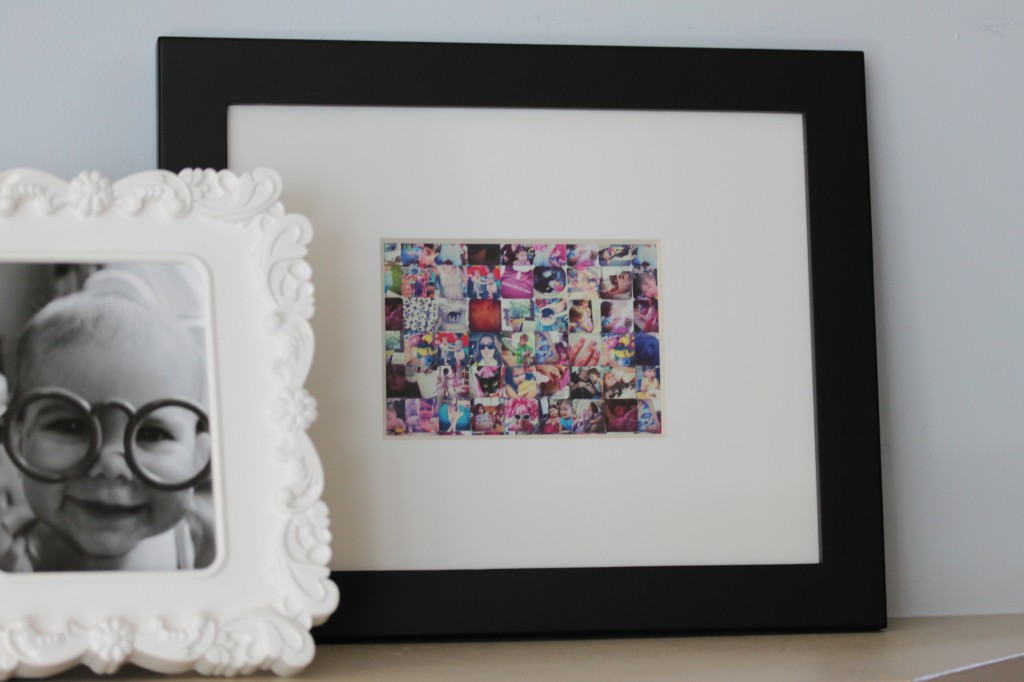
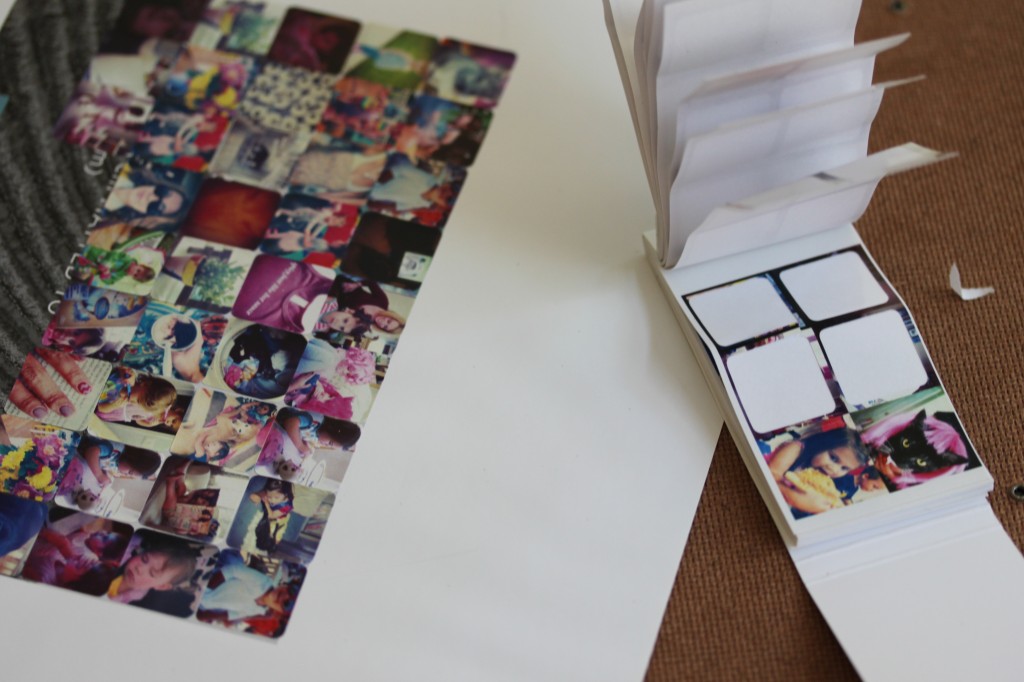
Next I made a neat piece of art by covering the insert area of a frame with stickers. You know, that part that is greyed out & says 5X7 or whatever the frame dimensions are? It makes a great template for creating a piece that will fit your frame. I’m hoping it will make people want to study it & see all the little images of our life.

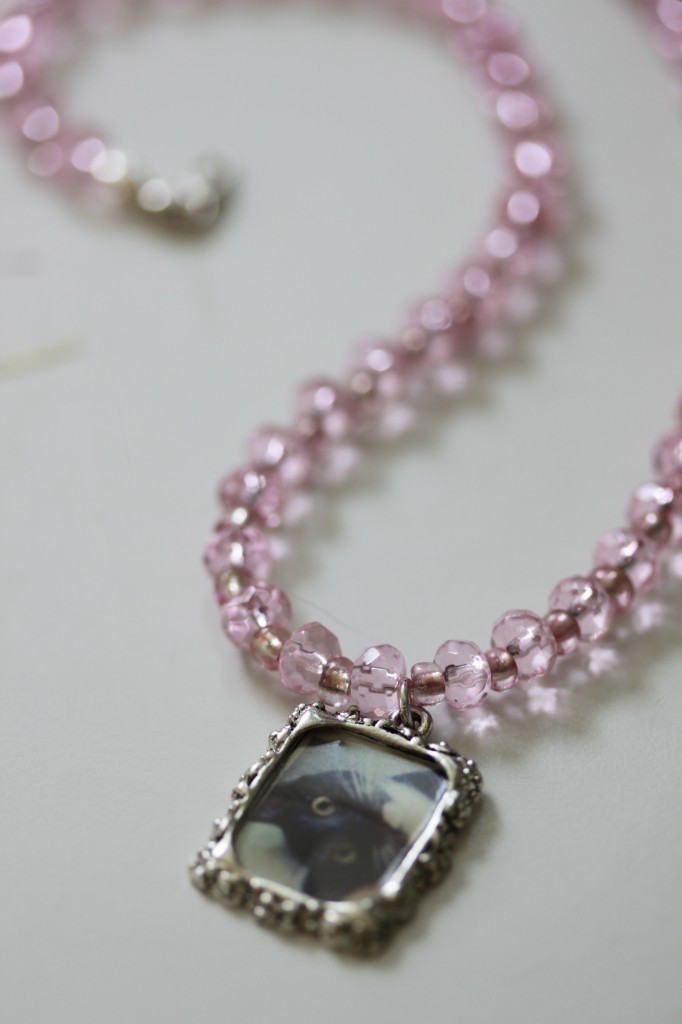
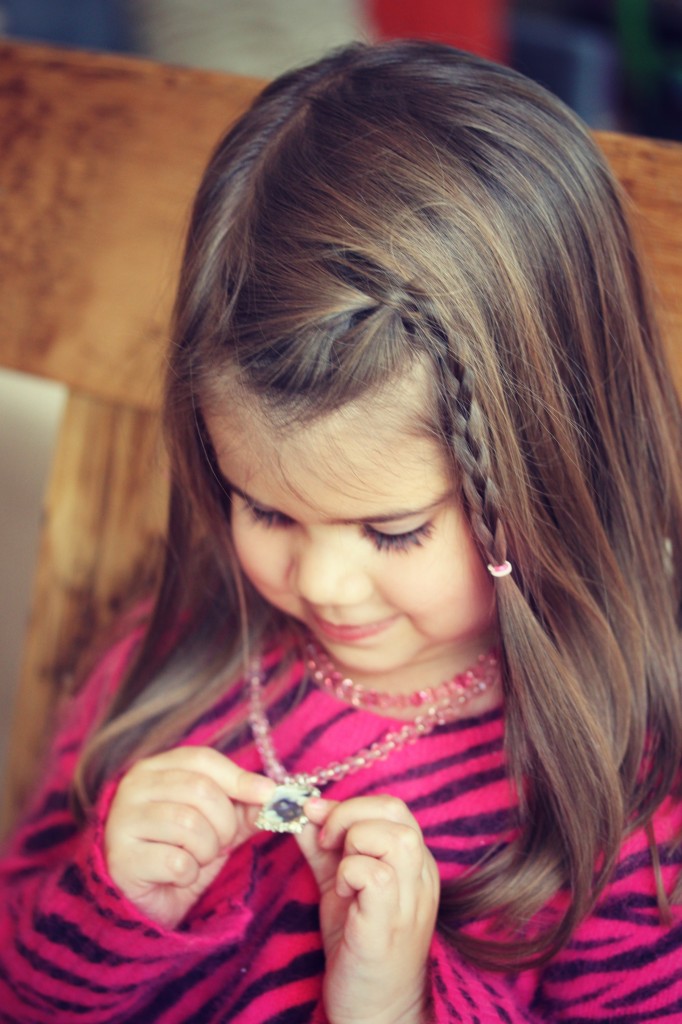
Last I thought Samster would appreciate a special little pendant with her favorite kitty. I strung a few different pink beads on some string & then just trimmed down a sticker of Rose to fit inside the little frame pendant. (I’m pretty sure I bought those in the beading section at Michaels)

The possibilities are endless really, keep this idea in your back pocket for Christmas time, if your relatives are anything like mine they eat up the personalized gifts.

If you’ve done anything creative with your Instagram photos please please share, I’d love to have more!!

Inspired? Share the Love...
Share on Facebook
Facebook
Tweet about this on Twitter
Twitter
Pin on Pinterest
Pinterest
Google+
Google+

{ }

girl’s room Makeover Part 1: Inspiration!

by Natasha on October 16, 2012 in decorating

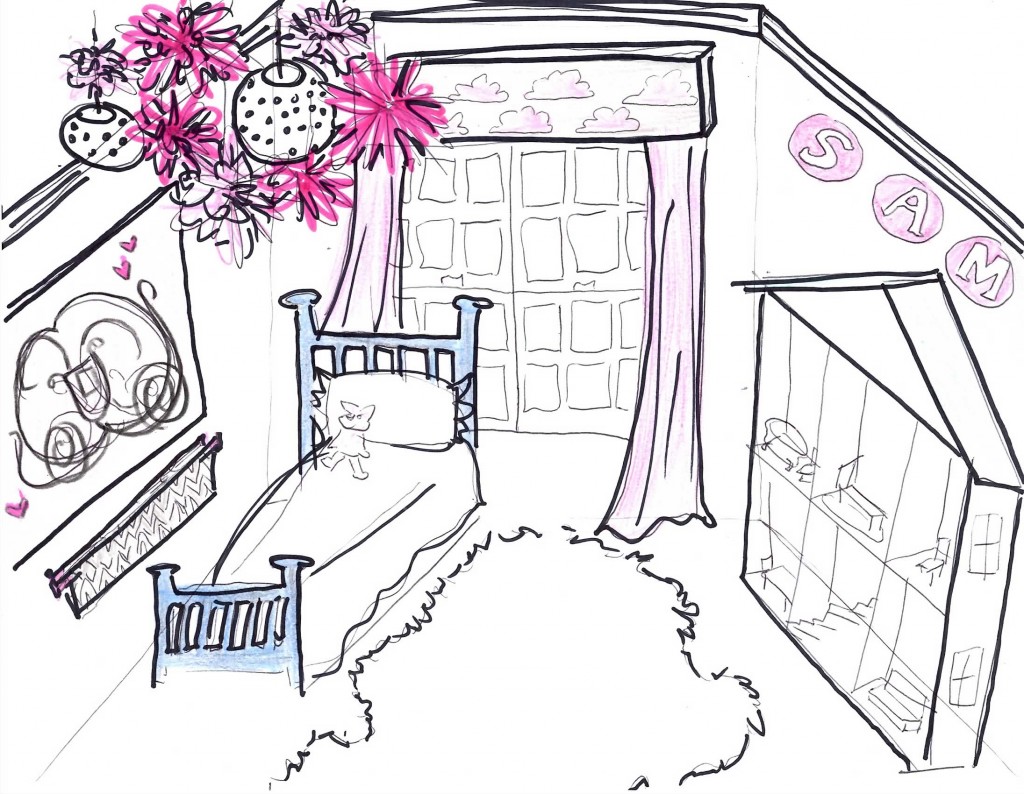
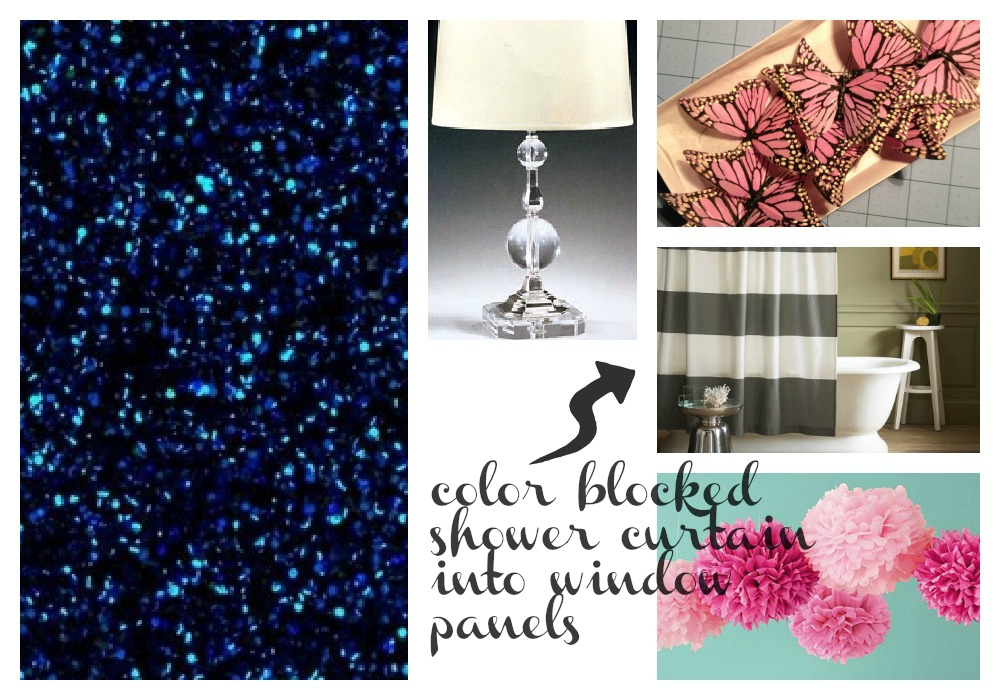
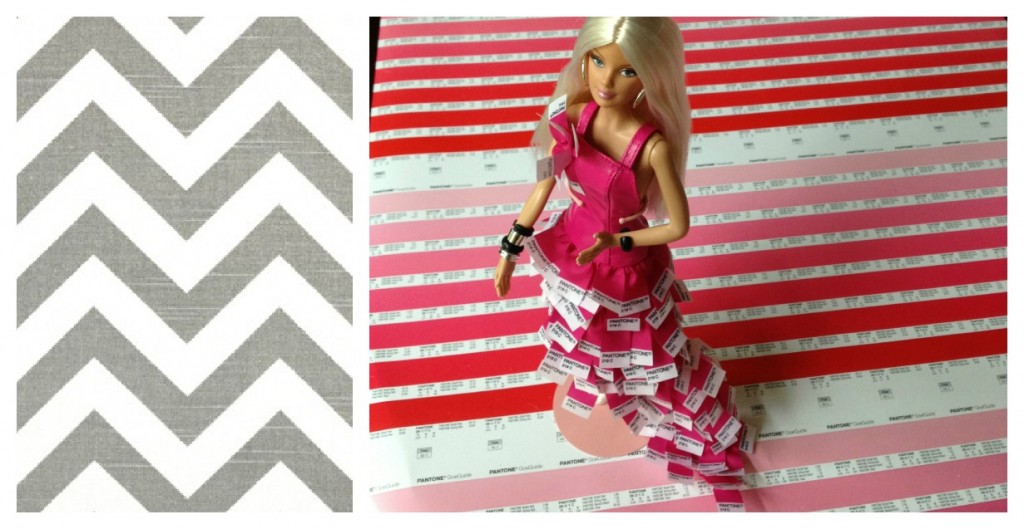
I’m SO excited for this room makeover! For months I’ve been dreaming about it. Literally. When I can’t sleep at night I decorate in my head. I’ll visualize rearranging furniture or color schemes. Does anyone else do this? After one particularly good ‘session’ I sketched out how I envision Sam’s room makeover to go…

If I was just the nicest mommy on Earth & gave her a bedroom that was exactly what she wanted the walls would be hot pink glitter & every flat surface would be covered in a life size Disney princess wall vinyl. Unfortunately for Disney I’m not quite that selfless. I want this room to be pretty & tasteful too. It’s a part of my home that everyone will see, why not make it a room I enjoy too?

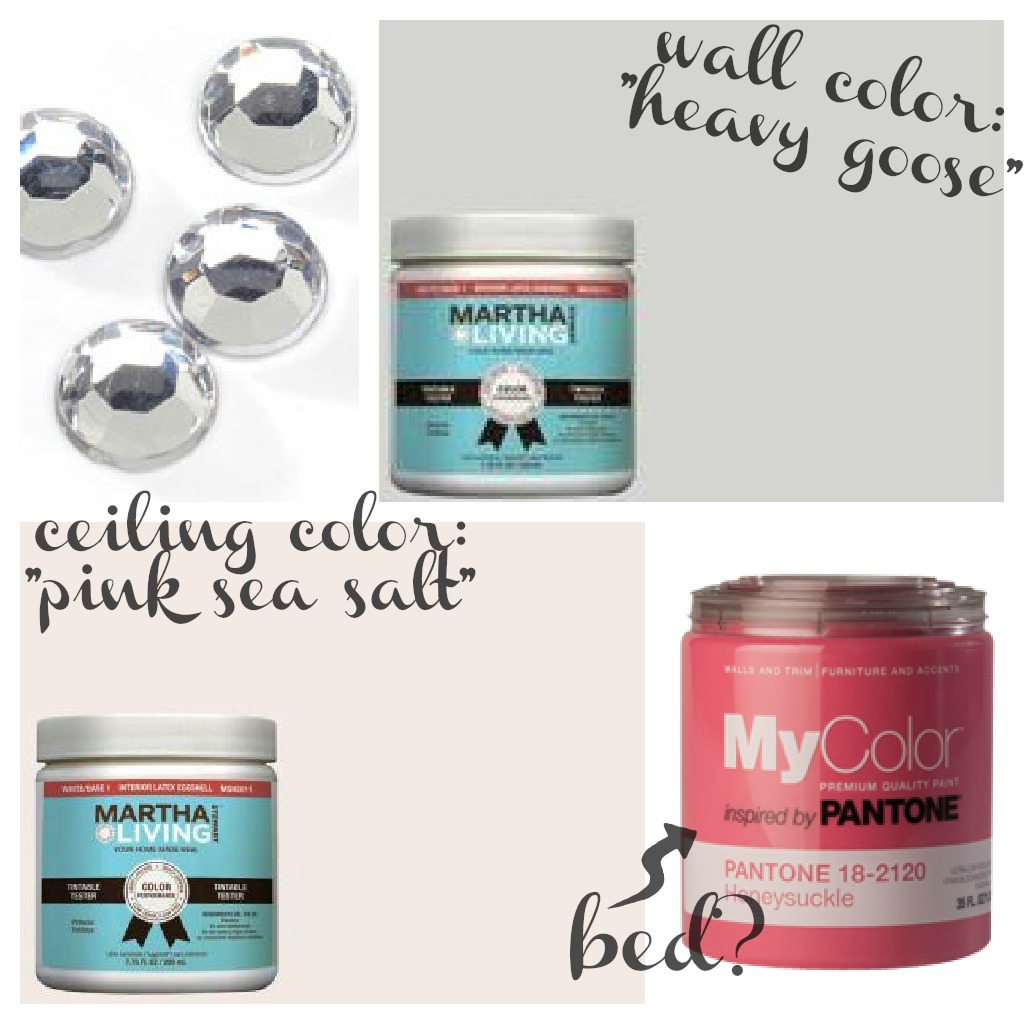
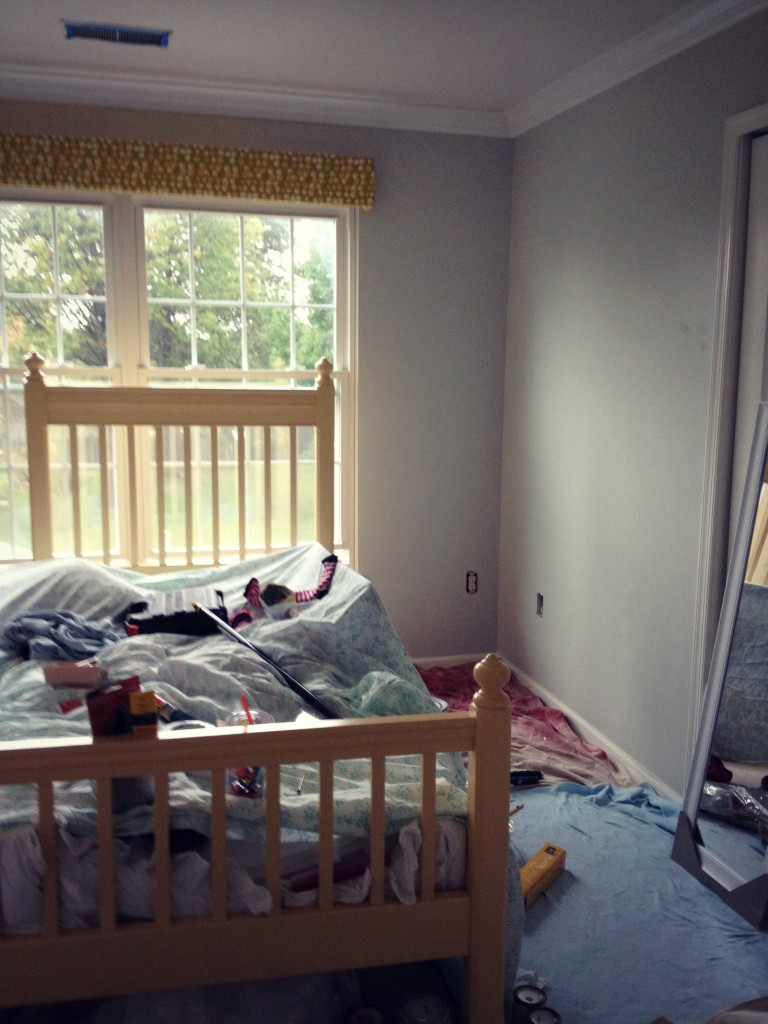
But hey, the kid’s gonna have ombre pink pom poms hanging from her ceiling & glittered carriage art on the wall, let’s not feel too bad for her.Over the weekend I was able to completely finish the ceiling. I also quickly remembered how much I dislike painting ceilings, it’s like painting upside down. It really does make SUCH a difference though, I highly recommend it in any room. I also got a good majority of the walls done. You can see the old beige poking through here & there, almost there though! I have had everything I need for this room for months, except energy that is, but now, now this room is going to be my bee-otch. Sorry Cinderella.

Inspired? Share the Love...
Share on Facebook
Facebook
Tweet about this on Twitter
Twitter
Pin on Pinterest
Pinterest
Google+
Google+

{ }

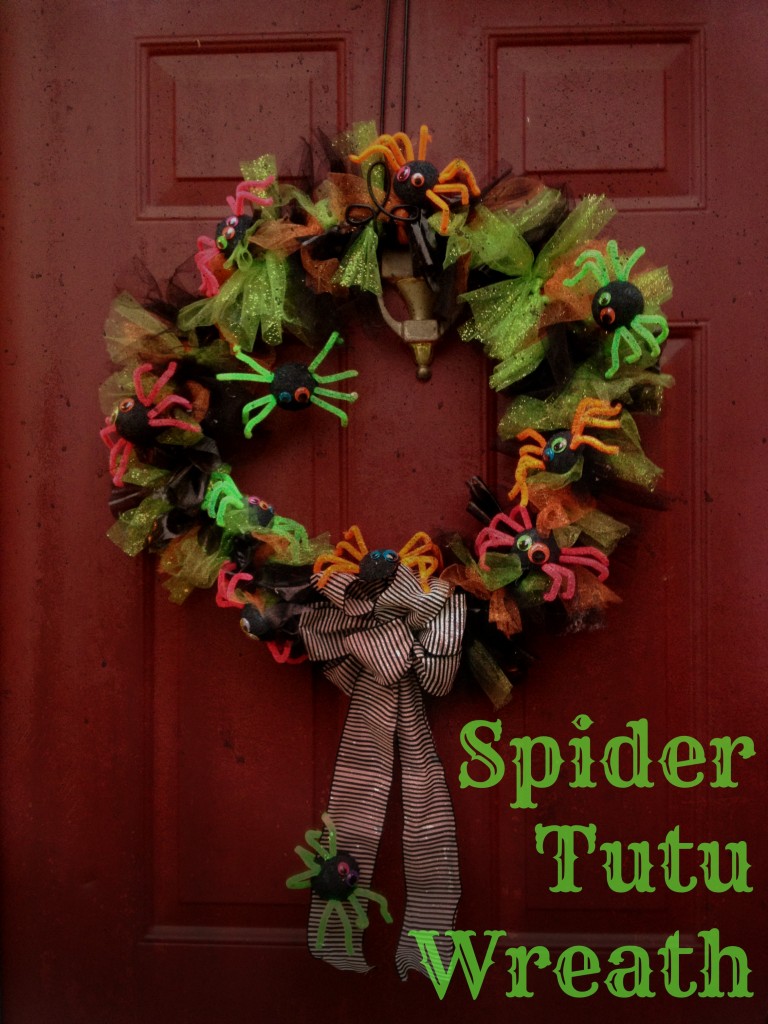
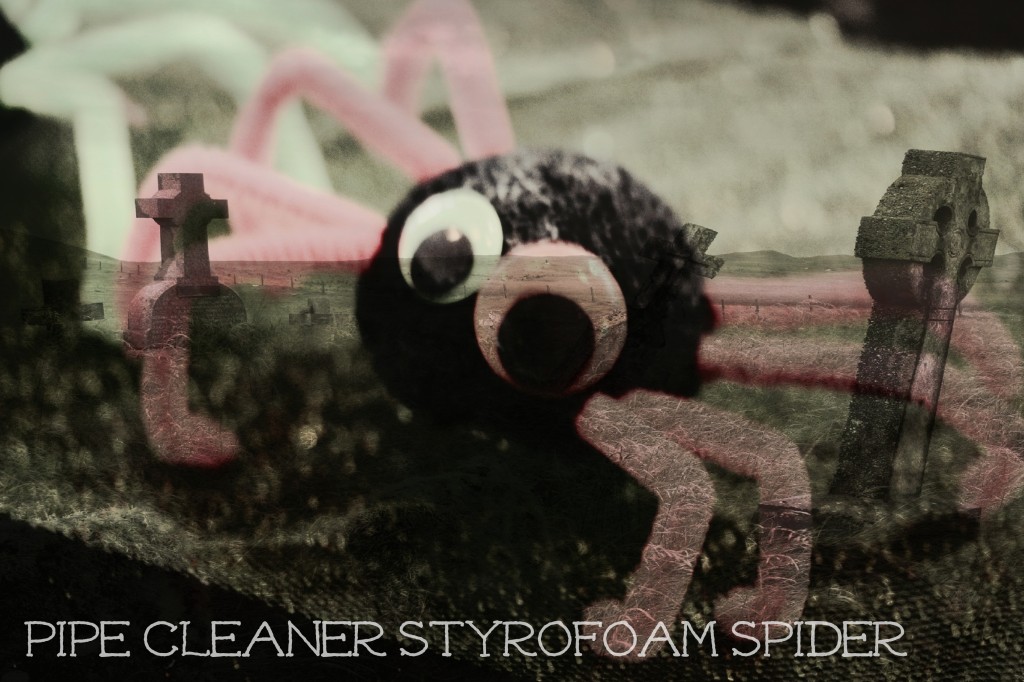
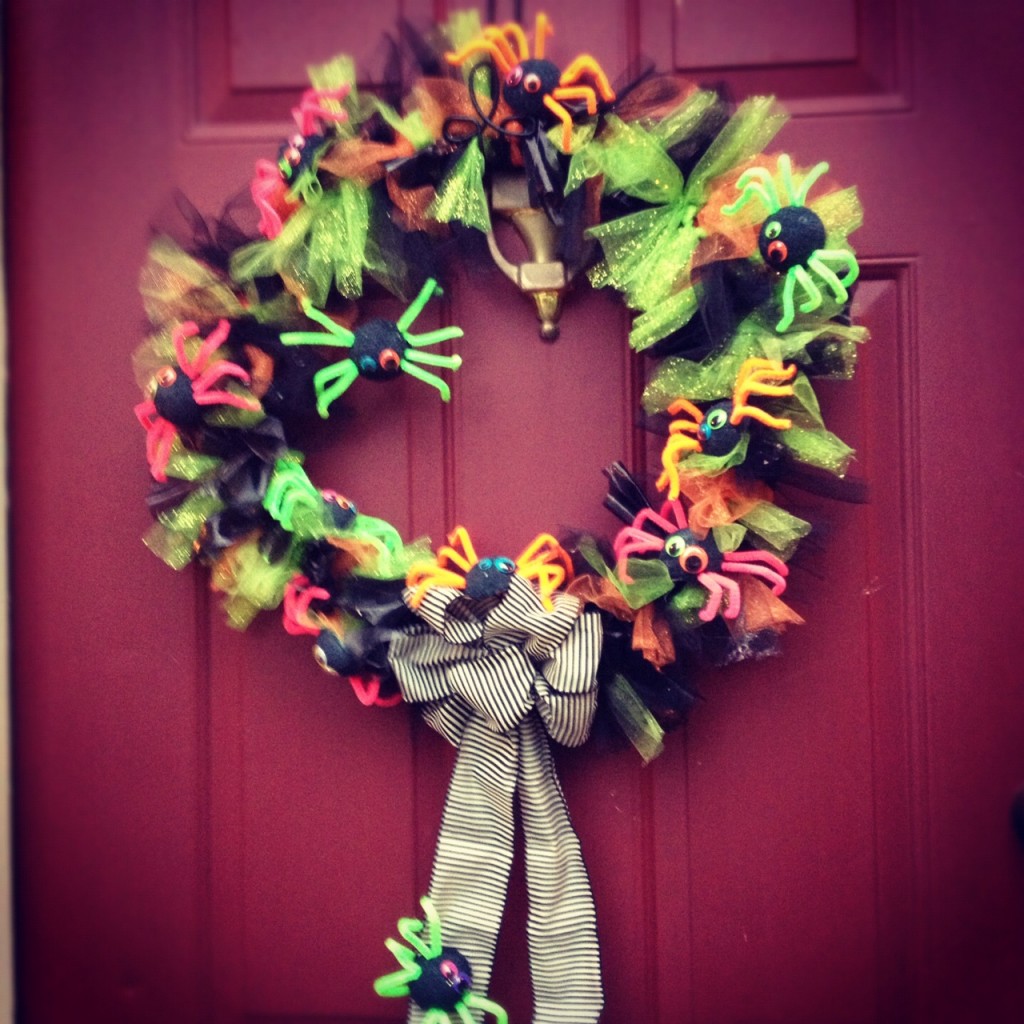
Spider Tutu Wreath: A Halloween Kid Friendly Craft

by Natasha on October 10, 2012 in tutorials

I was informed that I had to wait until October 1st to put up Halloween decorations. Guess what husband, Time’s Up!

This wreath uses the same concept as my 10 minute tutu, the only difference is we’re wrapping shorter strands of tulle around a wreath form instead of an elastic.

Here’s what you’ll need (I purchased my supplies at Michael’s)

  • 1 pack of 2″ styrofoam balls (cut in 1/2)
  • Googly Eyes
  • Hot Glue
  • Black Craft Paint
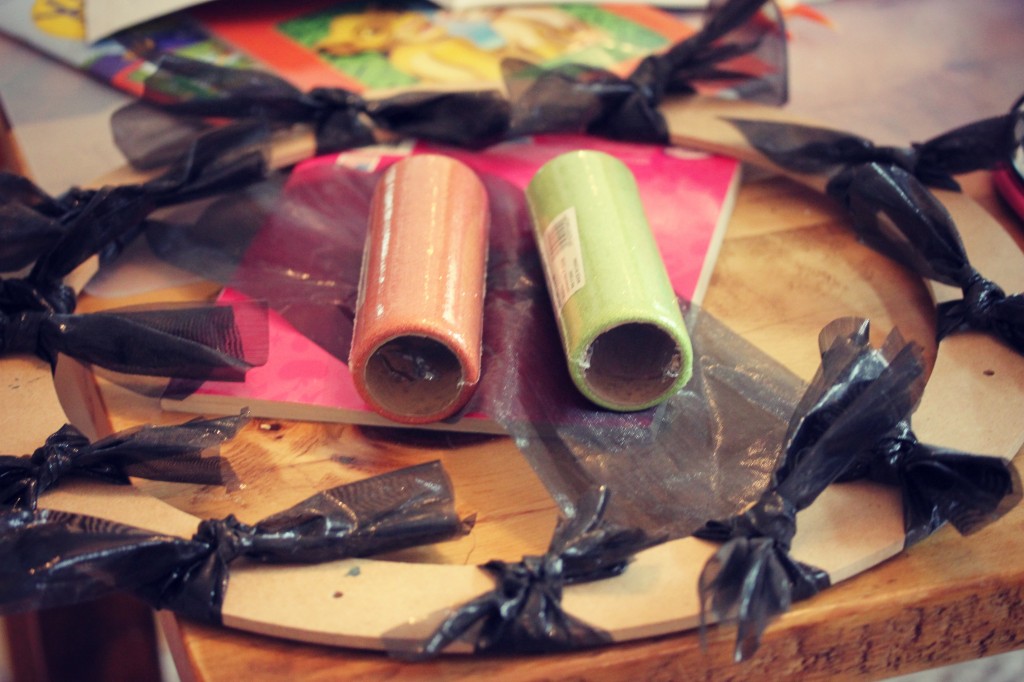
  • 4 rolls of tulle (I used black, glitter green, glitter orange & metallic black)
  • wreath form
  • Ribbon Bow
  • pipe cleaners

Now that my monsters are getting older I’ve learned I either need to craft in secret or find projects that have steps suitable for little helping hands. As soon as that glue gun comes out it’s like an alarm goes off in their heads “I help you! I help you!”

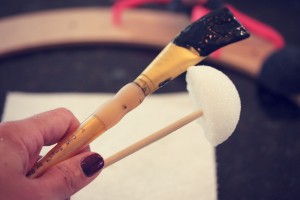
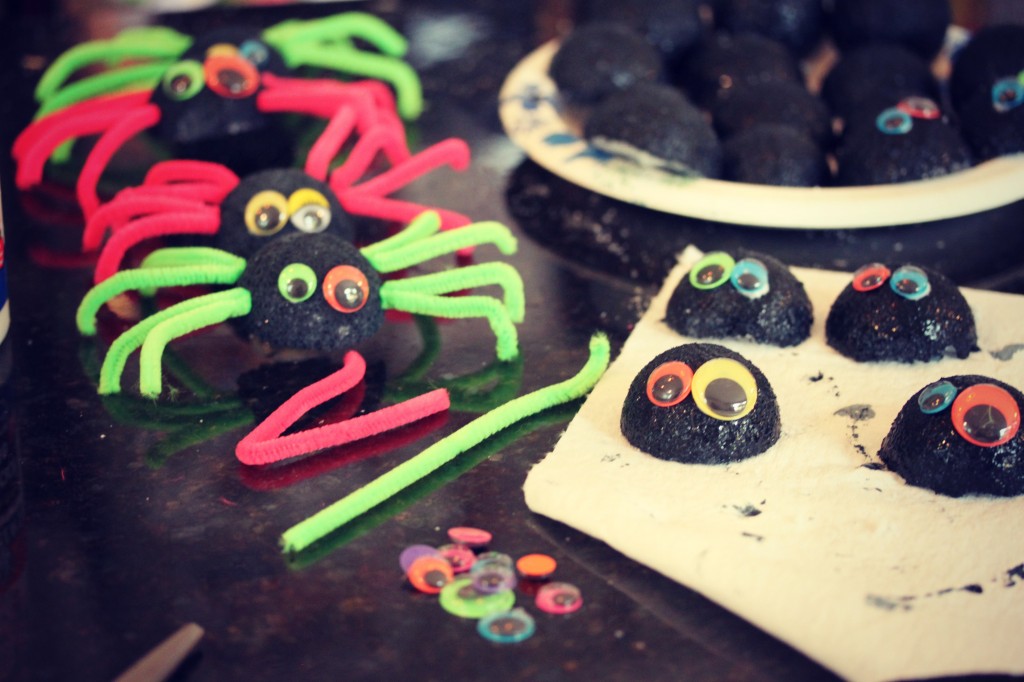
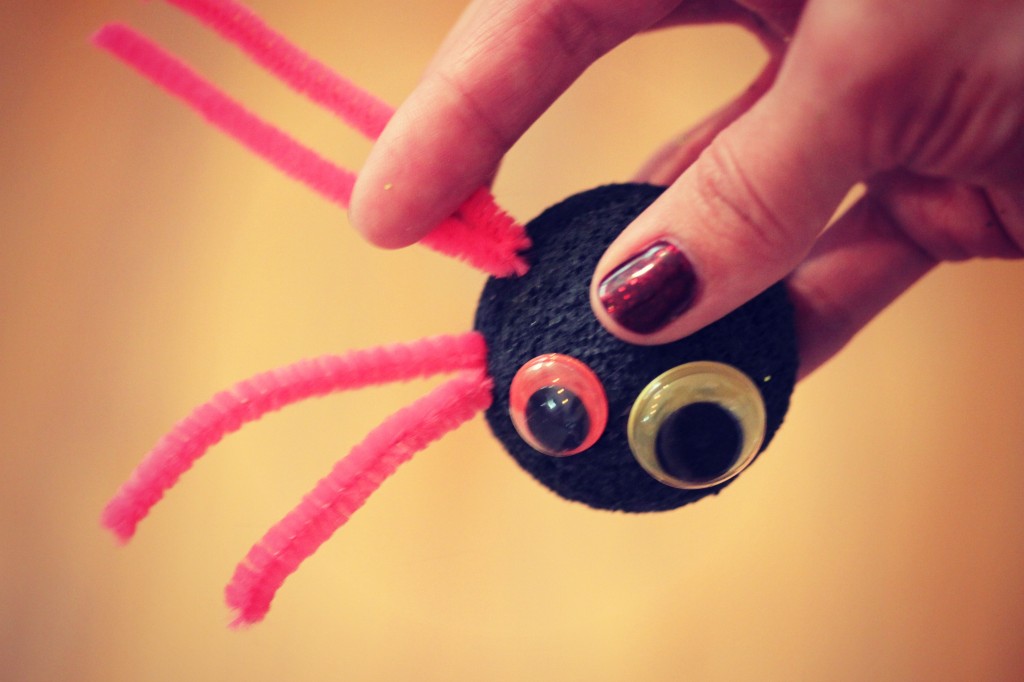
My girls were pretty content with the task of painting the styrofoam ball halves black & then gluing on the googly eyes (with white craft glue) when they were dry. *Tip* Use a kabob skewer on the underside of each spider to make the styrofoam easier to hold while painting.

While you’re waiting for the little buggers to dry you can get started on the tulle wreath form. I used rolls of tulle that were about 8″ wide but you could certainly cut larger pieces of tulle down yourself and probably save a few bucks. The tulle rolls are in the wedding decor section of your craft store and often the price is jacked up a bit. I suggest cutting all your tulle at once using this cardboard method, it’ll go by super quick. Each one of my tulle strips is about 14″ long. You might want to try one strip first however & make sure it’s long enough for you before you cut them all…

Then just double knot away!Once it was full I also trimmed the edges to even them out & fluffed up the pieces. I also tied on my black & white pre-made ribbon to the bottom of the wreath.

To give your spiders some legs simply cut a pipe cleaner in half & then fold each of those pieces in half. If you fold them well the little pointed end will easily push into the styrofoam. The last step is to hot glue on your wiggly googly new friends. I strategically placed some on the sides, some upside down & some even falling off to give it a look of spider infestation. Yick! *Tip* be very careful gluing spiders onto tulle, the glue will go right through the tulle & burn you, you’ll learn quickly though!

I think on Halloween night we’re going to stick our black light outside so all of the neon accents glow!

Have you put up any Halloween or Fall decor yet?? I have some more to show you tomorrow!

Inspired? Share the Love...
Share on Facebook
Facebook
Tweet about this on Twitter
Twitter
Pin on Pinterest
Pinterest
Google+
Google+

{ }

Black Eye Karma

by Natasha on October 9, 2012 in Uncategorized

A few months ago I was at my nail salon when I noticed one the techs who walked by had a whopper of a shiner on her right eye. Immediately I thought, Oh poor girl! Who is this man in her life that could do such a thing. Why is she ok with it? Is she scared to leave? Perhaps she doesn’t believe she deserves better? At this point she noticed my pitiful stares, shot me a what are you looking at bee-otch look & left the room. This just made me feel even worse for her, how embarrassed she must be. I started to wonder what she did that set him off. Was dinner not hot enough? Perhaps her greeting to the UPS man a bit too friendly? Jerk. I hope he gets a flesh eating bacteria on his penis.

It never even occurred to me that this girl who mind you I know nothing about could have never experienced any sort of physical abuse ever in her life…not until this past Saturday when Sam stood up right as I was bending down & her solid noggin collided with my eye socket. We were at the Baltimore Aquarium & right in the middle of everyone Sam & I were both crying. It was memorable to say the least.

3 days later & I still have this….
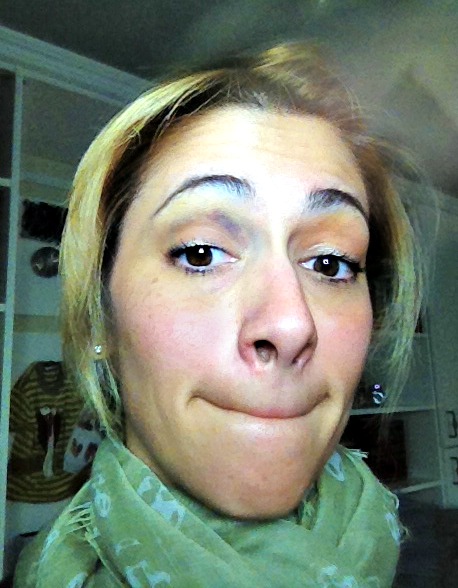
I’ve piled on a pound of concealer, have worn my glasses constantly & have never been so grateful for bangs. Although I still can’t help but wonder if people are noticing. Maybe even judging. I certainly judged the nail lady.

So my lesson is this, even if your intentions come from a loving place judging others is still just that, judgement. I’m going to try and re-wire my brain to stop assuming things about other people. Unless you’re in their home with them 24/7 you just never really know what might be going on in their lives.

I’m also going to keep a 3 ft distance rule when it comes to children in motion. Yeah, right.

Inspired? Share the Love...
Share on Facebook
Facebook
Tweet about this on Twitter
Twitter
Pin on Pinterest
Pinterest
Google+
Google+

{ }

So here’s what happened…

by Natasha on October 2, 2012 in Uncategorized

I was on my way home from school last week when I was attacked by a pack of wild dogs. I ended up in the hospital with a case of amnesia & no way of knowing who I was or where I came from much less my WordPress login. And that’s why I haven’t blogged.

At this point I’m sure your imaginations have run off with all sorts of speculations as to where I’ve dissapeared to. I’ve come to realize that posting a picture of oneself in the hospital on your social media outlets without any sort of explanation as to why you are there is not the wisest of moves. People tend to worry…sorry.

The truth is after my last post I started feeling a lot worse & made the decision to pack up the girls and head home to Nana’s house in Florida. While here resting things got bad enough that I went to the ER & ended up staying in the hospital for 3 days on IV antibiotics for an inflamed colon. Does that make you uncomfortable to talk about my colon? I suppose it is kind of like talking about your bootyhole. But listen…it’s just like opinions, everybody has one. Anyway, I’m back at my mom’s now recuperating & am heading back to DC later in the week to follow up with my doctors there. I’m not exactly sure why I stopped blogging, I do really love it here, it’s kind of an escape. I guess I just needed to give myself permission to shut down & truly rest. In hindsight I’m not really sure that was the right thing to do because I worked so hard for so long to build up my traffic & now basically flushed that average down the toilet but oh well, what’s done is done.

I have all sorts of pictures of past projects that I haven’t blogged about so I’m going to pull from those for the next week or so, hope you don’t mind. For today how about we catch up from the last week (or two).

There was a movie star on our flight down…

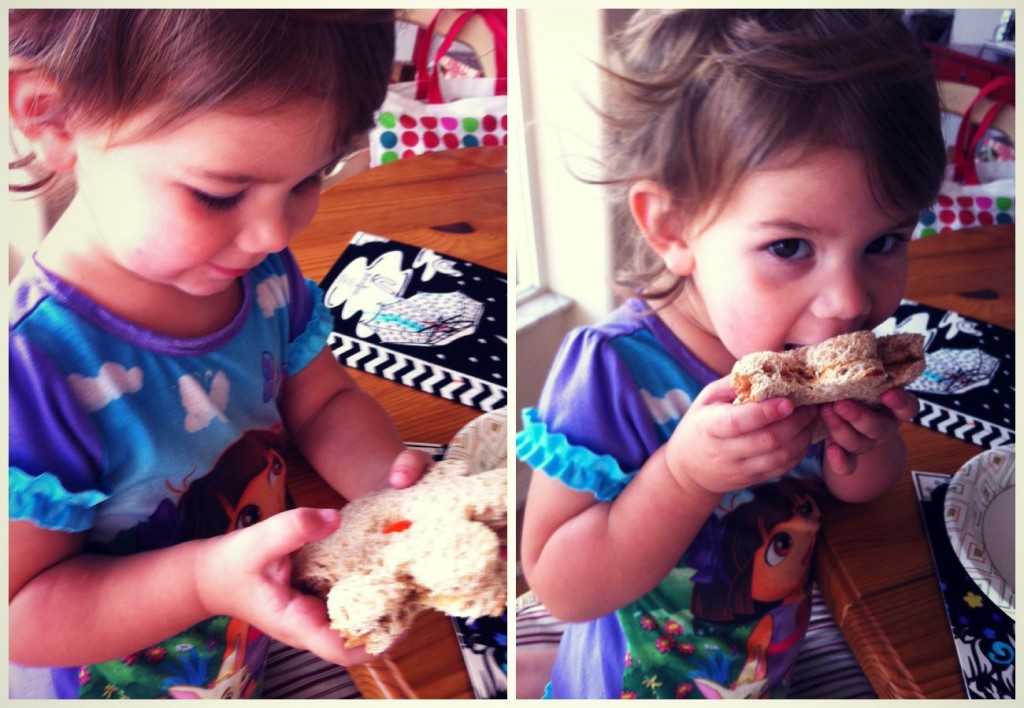
And I realized how Nana always gets the girls to eat their sandwiches. Nothing like a flower cookie cutter & a surprise M&M to get a 2 yr old to be your BFF.

There was music…

and nudism.And in addition to endless fun Nana, Pop Pop, Aunt Ti-Ti & Auntie Maggie kept my kids safe, sound, relatively clean & most importantly happy while I was out of commission.

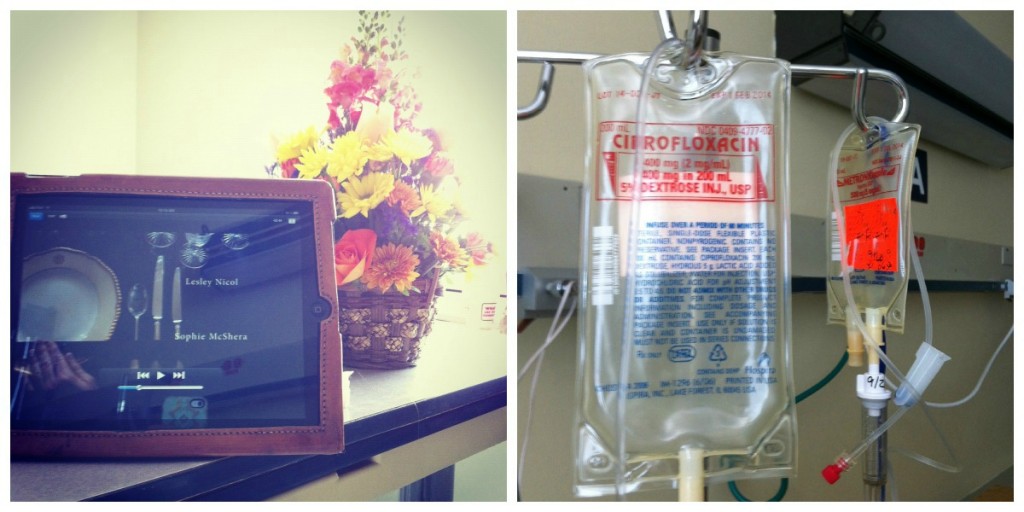
While my kids were at Retreat De Nana I had the pleasure of discovering a new favorite show… While in the hospital, I watched the entire 2nd season on my ipad and OH MY BBC GOODNESS am I in love. If you have a pension for period pieces & soap operas this show my friend you will adore.

Obsessively good entertainment & intravenous drugs…better than a spa.Finally I need to give a big thankyou to all my family for taking such wonderful care of me. It was absolutely heart warming to be reminded of how family jumps in & goes above & beyond when you need them. You don’t even have to ask.

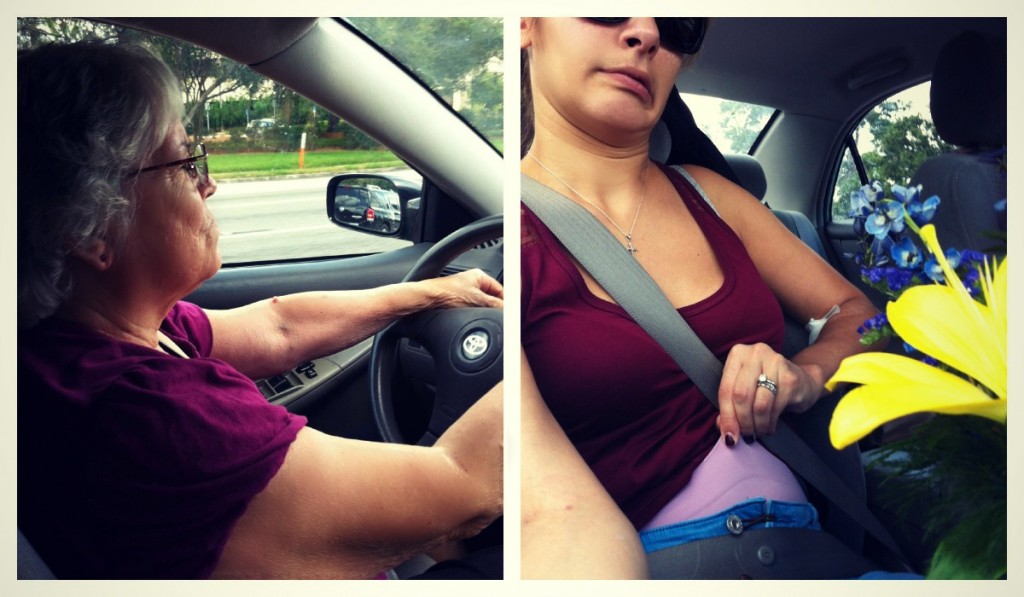
Abuela brought me cafe con leche & cuban bread every morning (even when there was a big ‘no food or drink diet’ sign on my door), she also drove me home & brought me clean underwear when I didn’t think to bring any. Yes, I wore granny panties, and was quite happy to do so. (notice the hair rubberband around my pants’ button maternity trick…best bloating tip ever)My Dad has been working non stop to find me the best doctors, my sisters have done my daughters’ nails (daily), my Tia jumped in her car & stayed with my kids when I wanted my mom to stay at the hospital with me…everyone was wonderful & I love them all. Perhaps that was part of the lesson I was supposed to take out of this experience…you can always count on family.

Inspired? Share the Love...
Share on Facebook
Facebook
Tweet about this on Twitter
Twitter
Pin on Pinterest
Pinterest
Google+
Google+

{ }

Painted Shoes

by Natasha on September 18, 2012 in tutorials

This isn’t going to be a terribly long post but if for no other reason than to generate some I ‘got back on the horse’ (or is it ‘got back on the saddle’? neither sounds right in my head) good vibes in my brain I wanted to put SOMETHING up. I mean, for Pete’s sake (no offense Pete), it’s been 3 weeks since I’ve posted a craft! Ugh. Saying that outloud makes me gag a little.

But whatever, there’s nothing I can do about that now except to try and get going again. What’s that saying about anything worth trying for or something? My brain is fried.

I found a wonderful primary care Dr as well as a GI & ID Dr so I just have keep on truckin’ and do what I can while they do their thing. I’m keeping a food diary & a symptom journal…trying to pinpoint what happens (if anything) right before I get a stomach ache/headache/fever. (my gut tells me it has to do with last year’s Lyme) I also know that blogging here makes me happy & happy=good. I’m making it a priority again. At least I’m gonna try, sometimes I just want to climb in bed & watch Honey Boo Boo. (Sketti anyone?)

I did spend some of my ‘resting time’ painting shoes & that’s what I wanted to share with you today.

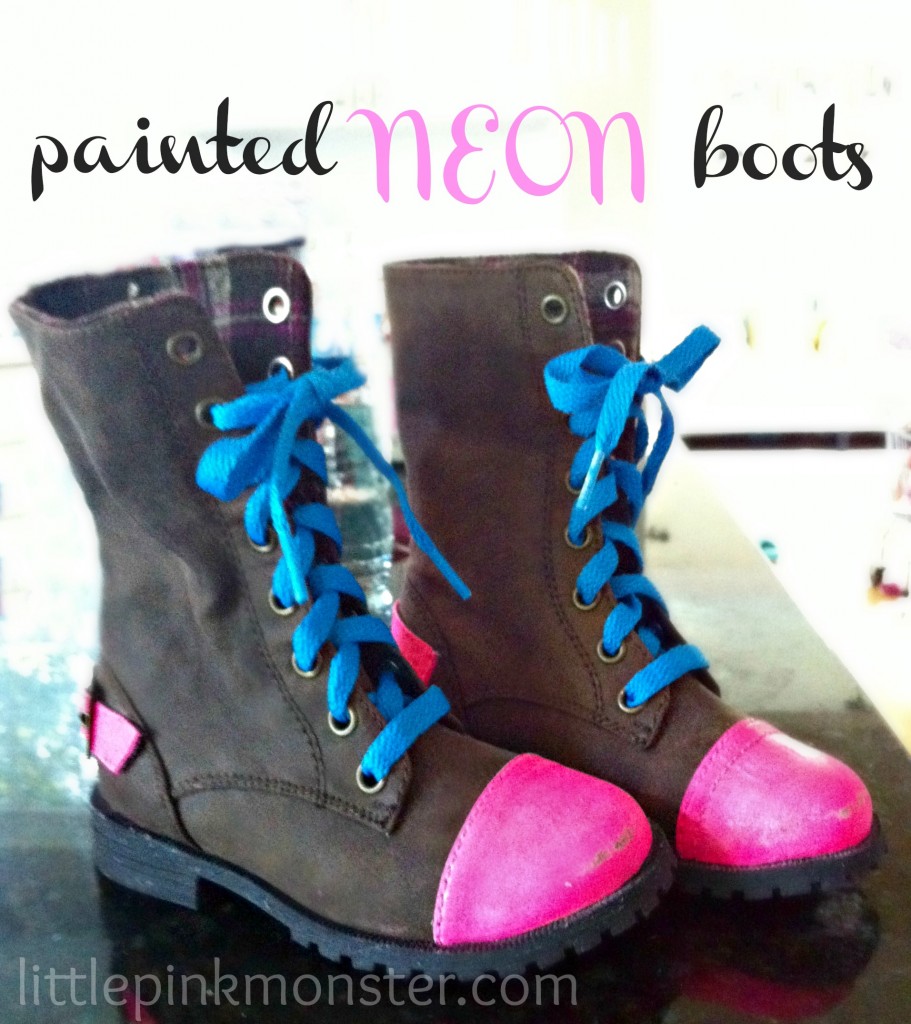
First, Sam needed some Fall boots that had more support than her usual Uggs. I love these lace up brown boots from Nordstrom but I knew she’d never go for plain brown boots. No way, no how. That’s ok, mama needed to get her DIY fix anyway…I taped off the toes & back buckle area & then painted them with white acrylic paint. (neon paints tend to be very transparent, they really need a good white base) After it dried (10-15 minutes) I applied the first of 3 coats of neon pink craft paint. I let them dry overnight & in the morning painted on a coat of my favorite polyurethane sealer, with shoes you really need to use some sort of sealant to prevent everyday scuffs from chipping off the paint. At this point the paint job looked a little too perfect considering the rustic style of the boots. I scuffed them up with some sandpaper around the toes & stitches. Perfect. Sam says as soon as I change the neon blue laces to pink she’ll wear them everyday. That kid, she’s a pink-a-holic. I can’t wait for her to wear these with her funky print knee high socks or contrasting tights with a frilly skirt & cardigan on top. Seriously, how cute would that be?? Maybe I can bribe her.

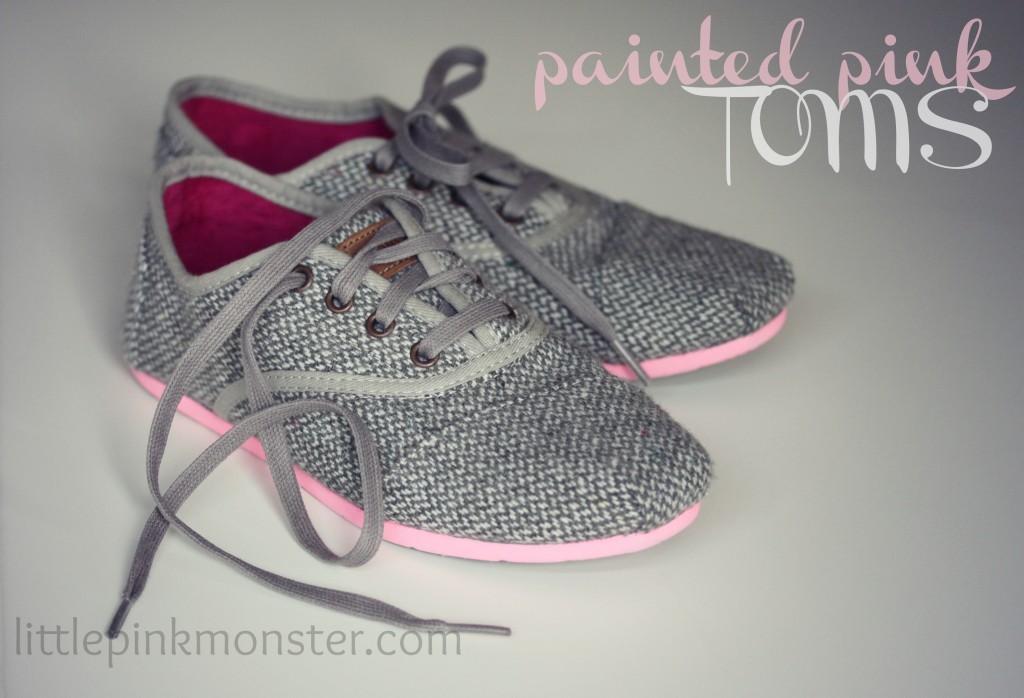
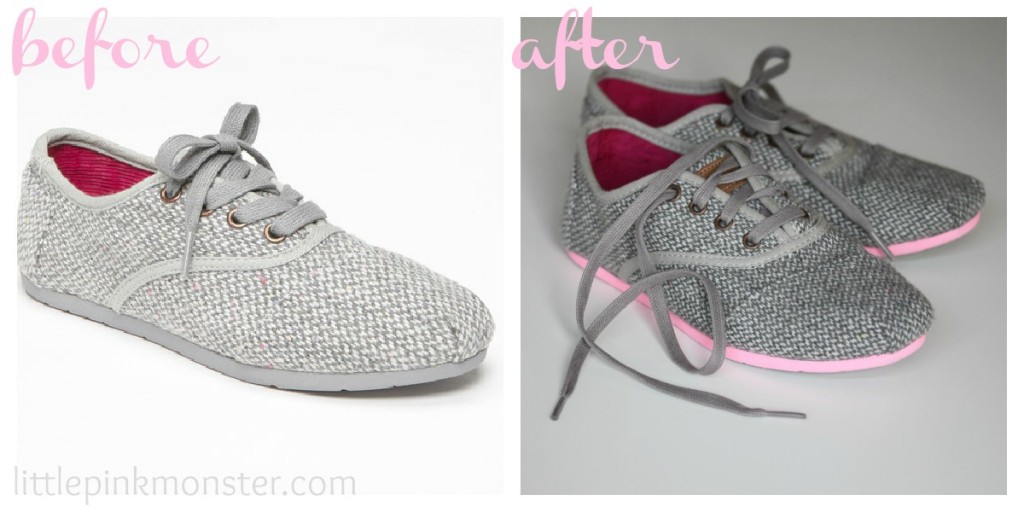
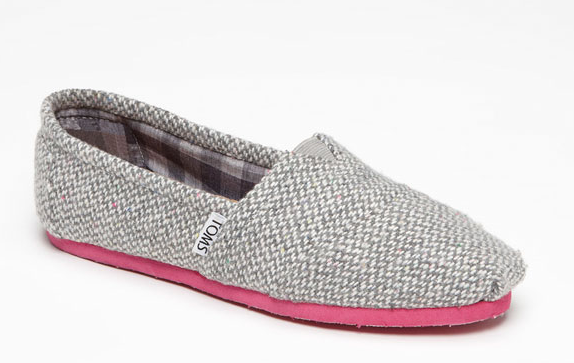
Next I decided to spruce up my Tom’s, why should Sam get all the pink? (For those of you LPM old schooler’s remember my utter disdain of Tom’s?? I’m making an exception, I’m kind of in love with the lace-up style) For some reason the grey tweed slip-ons come with a pink base but the lace-ups don’t. (see pic below) UNFAIR. I won’t stand for it…so I painted them too.

Toms Fleckpop Classic

Once again, white acrylic first, a few coats of neon (this time I mixed the neon pink with white to make a bright bubblegum color) & then a sealant on top. That’s it!

So are you itching to paint your shoes now? Go ahead, go to your closet right now & I guarantee you can find something that will make you much happier with a little pop of color. Don’t be scurred.

PS- Thanks for sticking around and being patient with my absence. You’re a good friend.

Inspired? Share the Love...
Share on Facebook
Facebook
Tweet about this on Twitter
Twitter
Pin on Pinterest
Pinterest
Google+
Google+

{ }

Blah blahh blah blah blah. Blah!

by Natasha on September 14, 2012 in Uncategorized

That’s what I feel like other people hear when I talk about my latest Dr. appointment.

I was just telling P how the Dr just called & said a Lyme infection showed up in my bloodwork for Tuleremia testing & he didn’t even look up from his laptop. “Uh-huh, really, that’s interesting, so um….yeah,  so what’s next?”

And when I tell my girlfriends about how I still have a stomachache & a fever AGAIN I get that same pitiful trying to act interested face but really they’re dying to talk about anything&everything else. Here’s the thing everyone, I’m bored with it too! I haaate it!!

It’s so not me to always talk about my ailments, that’s what grandma’s do on phonecalls, not 30-something year old active women with lots of fun, exciting things to say & do! Gr!

I’m getting really bummed over on the other side of this laptop & want to blog about something frilly, cheerful & happy to get me back in the game. Oo! I know!!

Wait for it…

Painted. Shoes.

I’ve been working on two pairs for me & one for Sam & they’re finally done so there’s absolutely positively no reason I shouldn’t blog about it tomorrow! And now that I’ve said it outloud to you it’s like a little insurance policy that I’ll get back on that darn horse and do it!

(And I know of few of you dear sweet souls are actually interested in my health so I will give you the update in a nutshell. Colonoscopy & endoscopy were just fine. Anesthesia is AWESOME. When I woke up my first thought was wait, maybe if I just close my eyes I’ll go back to that quiet happy placee…didnt work. You’re up and they get ya on outta there pretty right quick. I will no longer confuse “recovery” with “retreat”. The only thing not normal was the lining of my stomach was red, Gastritis they call it. And it’s really no surprise considering I’ve had stomach pain for 4 weeks. So the question now becomes what’s the cause.

I found a wonderful new primary care Dr who’s leaning towards the thought that I might have a bacterial infection transmitted by one of the buns scratching me. My Lyme also seems to be back. Somehow my gut says they’re related. But I guess I’ll leave the connecting the dots to the Infectious Disease Dr I’m seeing next week. Every day I still have a low fever that comes & goes, abdominal tenderness & occasional pain as well throbbing headaches every freaking evening. Those are getting annoying. Want to hear the really weird part?? LUCY IS SICK WITH SOME OF THE SAME SYMPTOMS! She’s achy, tired & is having major bladder problems. That’s werid to you too right? I mentioned it to the vet today during her appointment, he’s thought I was a little too coincidental and is going to do some broad bloodwork on Lu if the antibiotics don’t get her some relief in the next couple days. So my incredibly smart friend, any guesses??)

Inspired? Share the Love...
Share on Facebook
Facebook
Tweet about this on Twitter
Twitter
Pin on Pinterest
Pinterest
Google+
Google+

{ }

What what in the butt.

by Natasha on September 5, 2012 in Uncategorized

I’m still here and still poopy. Slight pun intended.

The urologist & gyno found nothing abnormal so yesterday I saw a GI Dr. The next step is basically to take a look inside & search for inflammation that wouldn’t show up on the scans so I’m off to have a colonoscopy & endoscopy…now. I have to admit, when he said he wanted to do this right away I’ve never been so relieved to hear someone tell me they’re going to stick something up my butt.

I just want a solution and to get back to life. I like to live by hitting the ground running, I miss it.

So I’d better go, appointment is in 15 minutes. Wish me luck. This will be the second time in my life that I’m hoping not to poop on the table.

Inspired? Share the Love...
Share on Facebook
Facebook
Tweet about this on Twitter
Twitter
Pin on Pinterest
Pinterest
Google+
Google+

{ }

Next Entries →
← Previous Entries

greeting

phone pic

LTL button

before after 

buttonbirthday buttonfamily dinner buttonmommy thoughts button

marthabadge1
Photobucket
Photobucket

Tags

beauty before/after birthday party cheater's cooking Christmas costume decorating dinner 101 DIY dress-up easy dinner fashion craft furniture gift ideas hair halloween health chats holiday home home decor instagram jewelry making kid's craft kid fashion lyme mommy blog mommy thoughts naptime crafting party pinbusters pinterest princess recipe review recipes sewing shopping sunday love thrift store finds tips & tricks toddler sewing tutorials valentines video vlog where am I?

Blogroll

  • A Beautiful Mess
  • Cancer Alliance Blog
  • Centsational Girl
  • Coco & Kelley
  • Cotton & Curls
  • Crafterhours
  • Craftiness is not Optional
  • Effortless Style Blog
  • Happy Together
  • Hi Sugarplum
  • Homemade By Jill
  • Honey We're Home
  • How Sweet It Is
  • Hyperbole & a Half
  • iHeart Organizing
  • Kristen F. Davis Designs
  • Lil Blue Boo
  • Little Green Notebook
  • Momastery
  • One Pretty Thing
  • Piccoli Piselli
  • PS- I made this
  • Skirt as Top
  • Smitten Kitchen
  • That's So Michelle
  • The Baking Robot
  • The Daybook
  • The Makerista
  • Victoria Elizabeth Barnes
  • Vintage Revivals
  • Young House Love

WordPress Admin