Little Pink Monsters

  • tutorials
  • Recipes
  • Contact
  • About Me
  • facebook
  • twitter
  • pinterest
  • instagram
  • rss

Send all complaints to Natasha’s Bladder, her body, USA

by Natasha on August 29, 2012 in Uncategorized

Remember that little issue I was having with tinkling? Throw in some brutal abdominal pain & that’s why I haven’t blogged since last Wednesday. UGH! I hate that I haven’t been on here for an entire week!

I feel like a dog terd. A big brown one that’s been sitting in the sun for a few days & is crusty on the edges with a few flies buzzing around it. (you’re welcome for that visual)

Basically I’ve been to the ER twice & spent 3 days last week in the hospital. I’ve been told I had appendicitis twice & then had the surgery canceled twice. At this point I’m betting that it’s something with a girly part & am hoping my OB/GYN will have a magic answer for me when I see her on Friday.

There’s so much I desperately want to do but right now it all needs to be put on hold until I can get back on my feet. Trust me, I hate saying that. I want to paint Sam’s room, photograph my furniture makeover & start running again. Stupid bladder. Or whatever the heck it is.

I’ll fill you in when I know something…

Inspired? Share the Love...
Share on Facebook
Facebook
Tweet about this on Twitter
Twitter
Pin on Pinterest
Pinterest
Google+
Google+

{ }

Cookie Monster Cupcakes {nom NOM nom!}

by Natasha on August 21, 2012 in tutorials

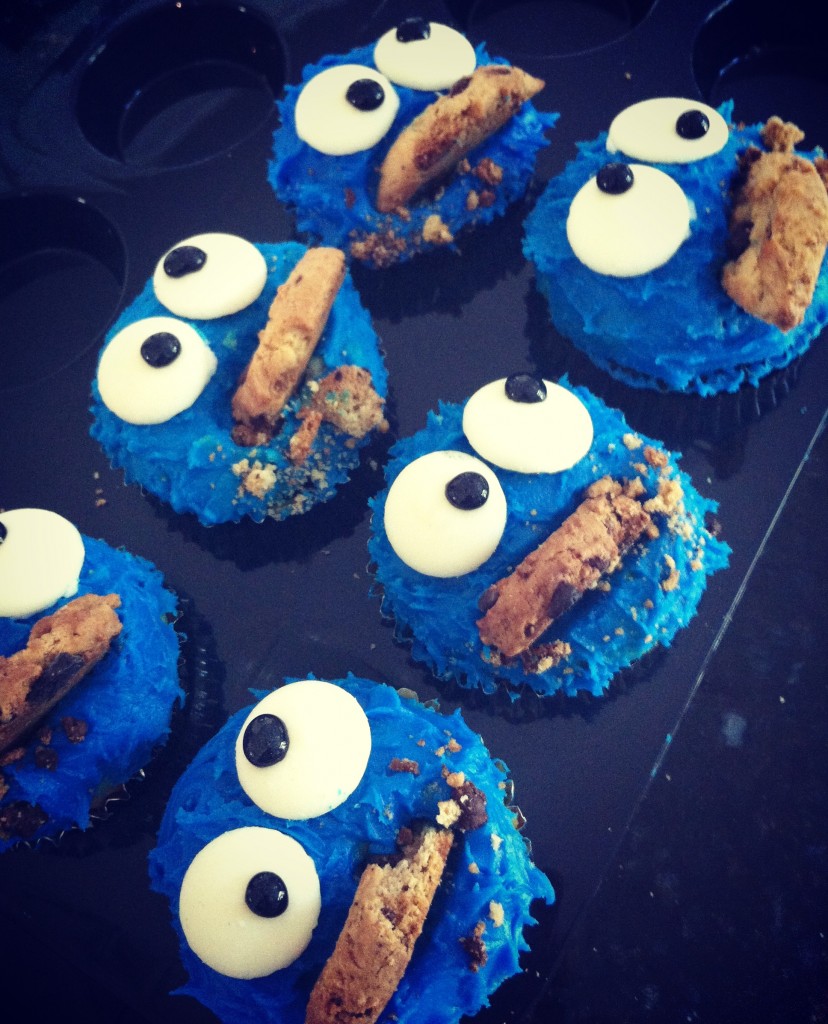
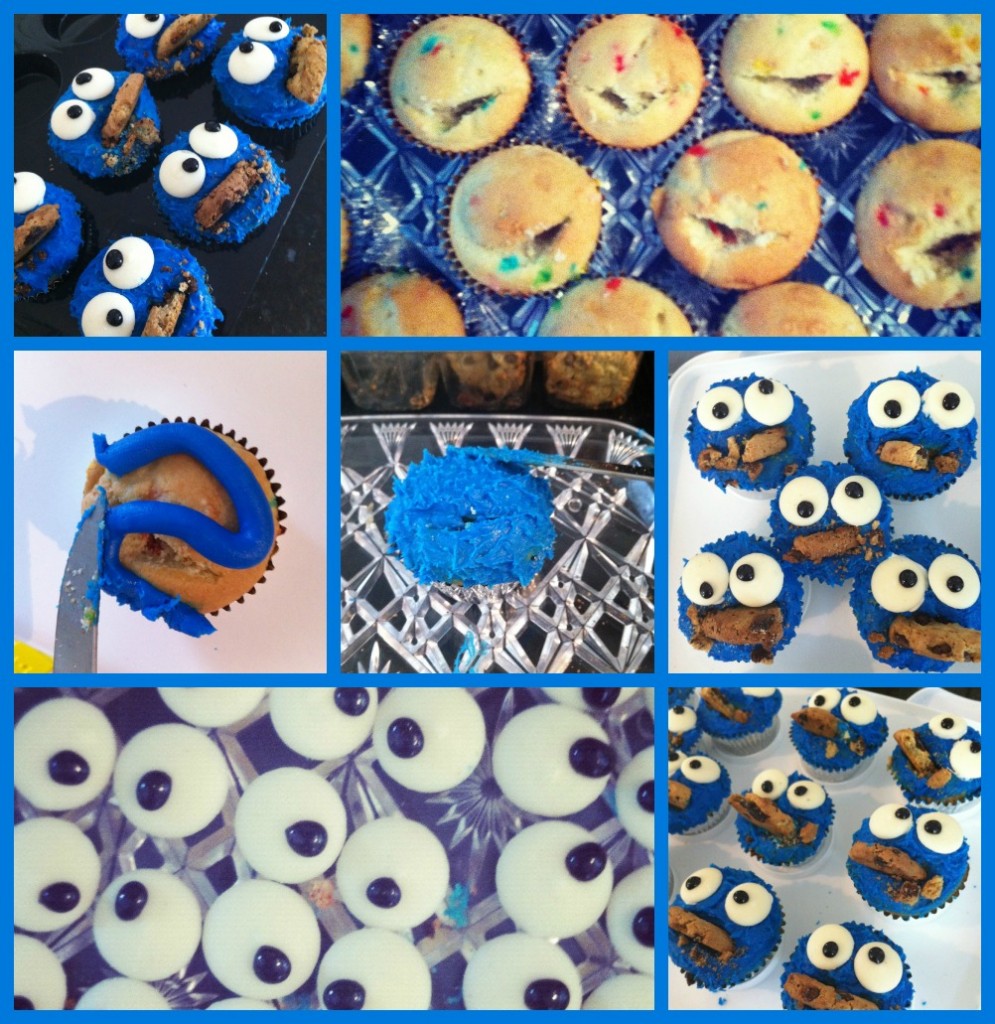
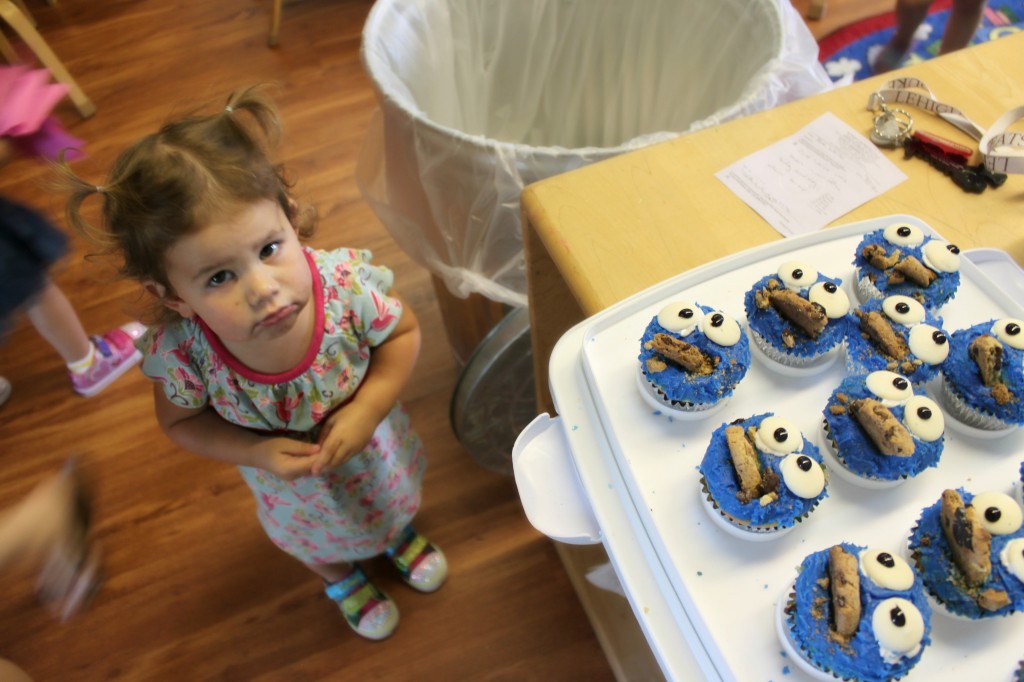
Gotta love Pinterest for giving me this idea. Sophie’s class of 2 year olds were certainly grateful. A baker I am not & let me say these were super easy. I used funfetti cake mix for the cupcakes, Wilton’s royal blue icing for the fur (3 tubes for 20 cupcakes) & white chocolate wafers with black gel frosting for the googly eyes. A lot of the Cookie Monster cupcake pins used a special tip & frosting bag for the fur. I started off trying that but it would’ve taken FOREVER. I found spreading the frosting with a knife & then patting it quickly with the side of the knife picked it up in a way that looked like fur. At least I think it looked furry. The last tip I have is to draw the pupils (more like dab or dot them) on the wafers & then stick the tray in the fridge for a few minutes to chill before attaching them to the cupcakes with a bit of frosting. When they reach room temperature they tended to melt & drip down the eye. Which was scary.

I’d also recommend refrigerating the finished cupcakes until you’re ready to serve them. Oh, and if you make these for a classroom birthday party I suggest passing along the message to parents to expect some bright blue poop from their kids. That frosting dye is crazy & can be quite shocking!

I can’t believe my big crazy girl is two already. Happy birthday Sophie Monster! You are dearly loved little one!

Inspired? Share the Love...
Share on Facebook
Facebook
Tweet about this on Twitter
Twitter
Pin on Pinterest
Pinterest
Google+
Google+

{ }

Bye bye buns

by Natasha on August 20, 2012 in Uncategorized

So sad that there’s no more Bunny Ranch! I’m gonna miss those little manic fuzzballs. If you missed the first videos you can find them here…
On another note want to see the cutest jeans I found?? (I’m truly heartbroken by the buns, can’t you tell?)
Get this, they’re from The Limited! I knowww. I haven’t been in The Limited since 2003 when I needed my first suit. I actually found a lot of super cute stuff though! Great basics. ANDDD everything was 40% off! At least in the store, although the jeans are 40% online, that’s $47.50 for cute (stretchy) skinny jeans! (I also bought the blazer at Gap, normally I skip blazers because they’re so restricting but this one is made from super soft knit. LOVE IT.)
Hope you guys had a great weekend. Mine was really nice, it was rainy & we all camped out on the couch. Perfection.
Oh, my back & head are still bothering me so I’m going to see my Dr again today, thank you so much for all your sweet well wishes last week!

Inspired? Share the Love...
Share on Facebook
Facebook
Tweet about this on Twitter
Twitter
Pin on Pinterest
Pinterest
Google+
Google+

{ }

Mommy Guilt Manifestation

by Natasha on August 15, 2012 in mommy blog

Mommy Guilt. Ick.

How do you even begin to describe it? The pit in your stomach you feel when leave your kid with a sitter & they’re crying. You may even feel it for leaving them at all. I’m on my second kid so I’m familiar with recognizing that guilt & most of the time I can easily remind myself that I deserve a break, I’m allowed to get a pedicure, it makes me a better mom, blah, blah, blah. I get that.

Here’s what I’m realizing about mommy guilt though, it’s a sneaky son of a bitch. It’s like the very hungry caterpillar I told you about on Monday. One day it’s a squishy nasty slug & then a few weeks later you could have a beautiful butterfly. It morphs so drastically you can’t even recognize it’s the same creature. Except mommy guilt doesn’t turn into a lovely Monarch, it morphs from a disgusting worm to a creeper moth. Just as unwanted & all from the same ugly place.

Allow me to explain…

I’ve had a backache for awhile now & well, I’ll just say it, it’s become really hard to take a leak. After a low fever popped up over the weekend & I felt like a truck had backed over me I recognized the symptoms & went to the doctor. A kidney infection, lovely. That’s all good & fine, the girls had camp Monday morning & P was a major trooper helping with them the rest of the day. I was OK with accepting a sick day, I was sick afterall. A couple doses of antibiotics & I could be back to business.

Except then I stayed sick. Monday night I felt worse, yesterday was miserable & seriously I COULD NOT PEE. At least not without a heck of an effort. My doctor isn’t open on Tuesdays so I decided I should just go to the ER & get checked out. I wasn’t in agonizing pain but I felt pretty certain I had some sort of blockage, so I went. Going to the ER when you’re a stay at home is not as simple as just taking yourself. I had to rely on my dear friend Stacy to watch my kids. Fine. She has kids the same age & I’ve kept hers before. I still felt guilty for leaving them but she assured me it was ok. I get to the ER & of course it’s a 5 hour ordeal, which means P had to pick the kids up from Stacy’s after his work event on the other side of town. Oh, and of course I had the carseats & was on the other side of town so I had to then ask my other friend to go to Stacy’s house, watch her kids so Stacy could drive MY kids in her van with her carseats to meet P at our house. If you’re not following basically I felt like I had majorly inconvenienced 3 different people because I couldn’t get myself together. I felt (feel) like I shirked the responsibility of watching my children, which IS my job after all, onto other people who really shouldn’t have to take that on. Except for my husband, yes he should help out when I need it but he had already helped me so much that week that I felt like I was sucking him dry too.

The Er doctor, who literally saw me for all of 30 seconds and didn’t even examine me, said that my bloodwork was fine, I should follow up with a urologist & he was sending me home with pain medicine. After FIVE HOURS that was it. No scans, no pushing on my belly does this hurt? Nothing. And THAT is when the guilt set in. I was coming home with no legitimate reason that I could justify inconveniencing everyone else. I even felt bad that I wasted the craptastic doctor’s time. From then on the guilt has been drowning me.

I’m trying to do some internal digging as to why I feel this way when deep down I know it’s probably not justified.

I don’t think it’s just my personality. When I was younger & was sick I had absolutely no problem accepting help from others. In fact, I’m sure I milked it for all it was worth. This didn’t start until after I became a mother.

Could it be we become so used to taking care of everyone else that when we need to be taken care we’re mentally unable to accept it?

Maybe being a mother turns you into a bit of a robot. Your brain gets rewired so you can no longer just let yourself be enough.

I am enough that I deserve to accept help from those who love me. I am a regular person & am vulnerable to the weaknesses of the human body just like those I take care of. When my friends or husband get sick I don’t look down on them for checking out. I certainly don’t abhor them for needing my help. I insist on helping them! So why is it so hard to believe that is exactly how they feel about me?

Perhaps if we had designated sick days, like in a regular job, then we wouldn’t feel like we were doing something wrong by staying in bed.

There is no set time off when you’re a mom. Perhaps the other side of accepting that concept is that when life does happen, which it inevitably will, and you HAVE to take time off you’re no longer able to do so without feeling like it’s wrong.

Inspired? Share the Love...
Share on Facebook
Facebook
Tweet about this on Twitter
Twitter
Pin on Pinterest
Pinterest
Google+
Google+

{ }

The Very Hungry Caterpillar

by Natasha on August 13, 2012 in Uncategorized

First up though, a big thank you to everyone who contributed to our Blog & Tell over the weekend, I received over 50 home beauty recipes & I’m seriously so excited to try them! If you have a sec it’d be worth your while to peruse the comments…there’s some darn good ones in there that you probably already have in your pantry. Soooo, the randomly chosen winner of the $25 Sephora giftcard is…Yayy! If you’re SkateHop please email me at natasha@littlepinkmonsters.com with your address so I can mail your giftcard to you. Oh, and give me a few days to run to the mall to pick it up, I’ve been wanting an excuse to hit the American Apparel kid’s clothes anyway. (:

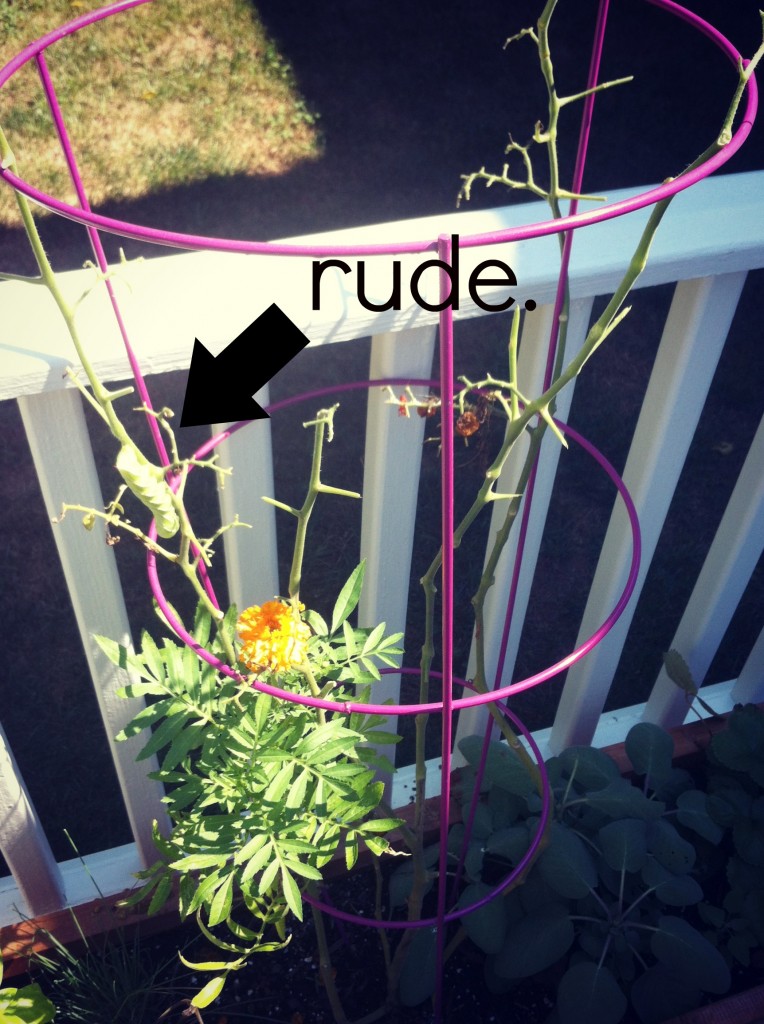
So here’s what that title is all about. Yesterday I was sipping my coffee staring off into the backyard when I noticed that my tomato plant looked funny. It looked naked.

I went outside and saw the biggest, squishiest, greediest caterpillar EVER.

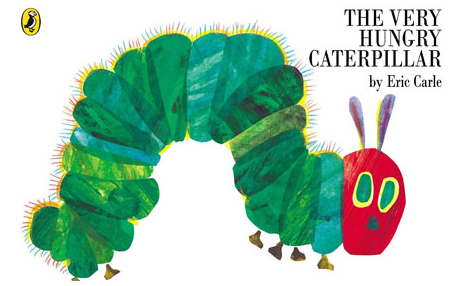
At first it was kind of neat because does he (I’m assuming it’s a ‘he’, no caterpillar balls could be seen or anything) not look exactly like Eric Carle’s The Very Hungry Caterpillar?!

Then it set that he had eaten EVERY SINGLE LEAF & TOMATO that was on my 3′ tall plant. Grrr, I’m not a good gardener & this vegetable box the girl’s & I planted at the beginning of summer was quite an accomplishment. I was so intrigued by this obese green jellyroll however that my anger soon dissipated. At least I had contributed to a beautiful butterfly.

Or not.

According to Google this fatty was going to be a SPINX MOTH. ACK!

By the afternoon he had worked his way through my entire eggplant & I’d had enough. I relocated him & a little baby green caterpillar to a random giant weed on the side of the house. I’m hoping I can at least use his massive appetite for good.

Hope your weekend was great, I promise an update on the buns tomorrow, I just need to edit the video!

Inspired? Share the Love...
Share on Facebook
Facebook
Tweet about this on Twitter
Twitter
Pin on Pinterest
Pinterest
Google+
Google+

{ }

Blog & Tell: Homemade DIY Beauty Treatments

by Natasha on August 10, 2012 in blog & tell, pinbusters

At the bottom of this post we’ll do the ‘blog & tell’ & share all of our recipes. First, here are a few I tried out for you Pinbuster style

Did you see the little instagram tease I put up last night?

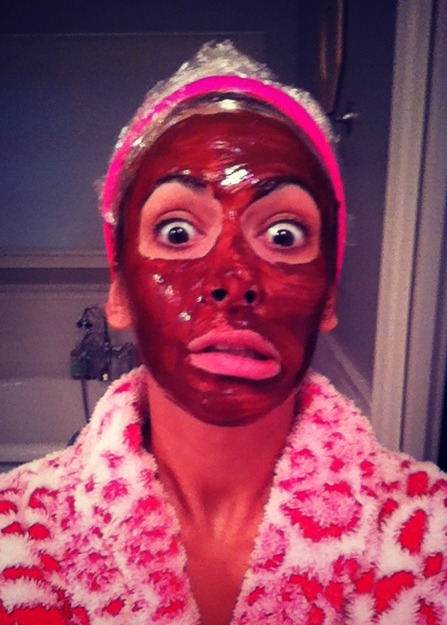
Well that…turned into this!

ACK! Good morning!! You’re awake now, aren’t you?? Sorry. Last night I came downstairs with this on & P was looking out the window at the rain, I stood next to him while he continued to tell me how it wasn’t good that the clouds were moving in a different direction than the tree tops. (he’s a meteorologist in his fantasy life) I was just nodding & uh-huh-ing until finally he looked over at me & I swear HE JUMPED 3 FT BACKWARDS! I guess a plastic wrapped head & chocolate face just doesn’t do it for him…go figure.

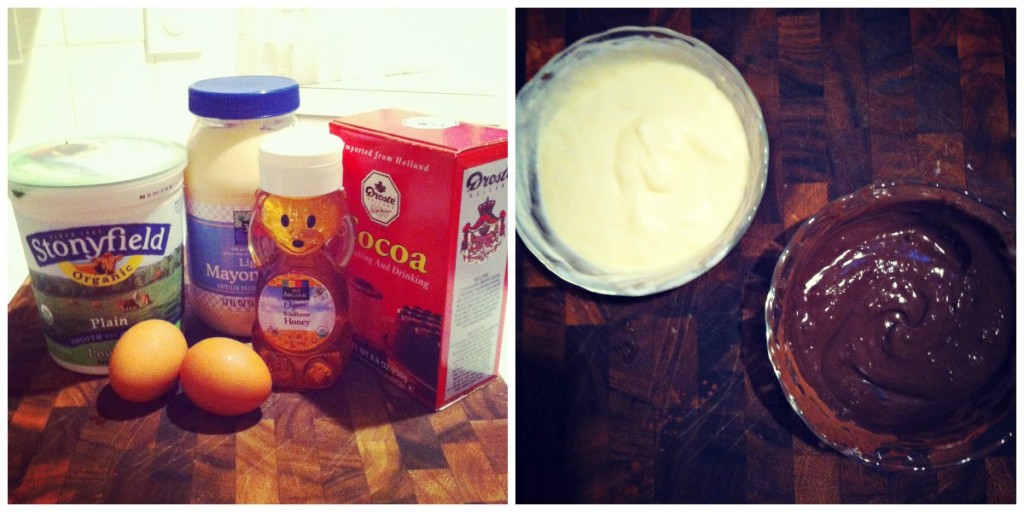
I picked the Mayonaisse, Egg White & Yogurt Deep Hair Conditioner & the Chocolate Honey & Yogurt Face Mask as my two DIY beauty experiements. I had every single ingredient for both of these in my kitchen already, which was nice, & they whipped up pretty quickly & easily, so far so good.

I’d say the only tricky part was applying the hair treatment. Smearing mayo all over your head takes a bit of a strong stomach, I smelled like a giant walking egg salad sandwich the entire time. Since I had to let both sit for around 30 minutes I wrapped my hair in cling wrap so I wouldn’t spread my mayo-ey goodness all over the house.

Applying the chocolate mask on the other hand was relaxing in itself. It’s cool, creamy, smooth & smells like dessert. I used a basting brush to apply a thick layer all over, just that process made my shoulders relax.

And the results?

My skin felt much softer & tighter after the mask. In fact, it still feels soft today. I’ll be chocolate masking it up again, that’s a good one.

My hair I’m torn about…it’s absolutely, positively shinier. Without a doubt. BUT I thought it would also be softer and it’s not. It almost feels a little heavy…maybe even dirty. This could be because I either used too much of the mask (I absolutely slopped it on) or my hair is just too far gone from bleaching it. The shine I can’t dispute though so maybe I’ll try this one again…

It’s hard to capture hair shine in a picture, I also just blew dry the front part of my hair because I pulled my back carrying Sam up the stairs this morning. Yep, I was carrying my 35lb 4 year old up the stairs. She said her belly hurt & I’m a sucker. Now I’m a sucker with a heating pad…and shiny hair.

 Chocolate, Honey & Yogurt Face Mask: Mix equal parts (I used 1 tbs) cocoa powder, honey & yogurt in a small bowl until creamy & smooth. Paint all over face excluding eyes & lip area. Let sit for 20-30 minutes or until dry & firm. Rinse off with warm water.

Mayonnaise, Yogurt & Egg White Deep Conditioner: In a small bowl mix 1/2 cup plain yogurt, 1/2 cup mayonnaise & the egg white from 1 egg in a small bowl until smooth. Apply all over dry hair paying special attention to damaged, dry areas such as bangs & tips. Leave on for 30 minutes & then rinse extremely well with warm water. Shampoo if desired or leave just rinsed overnight & wash out completely in the morning.

Now it’s time for the fun part! I’m so excited!! In the comments below please share your tried & true at home beauty treatment!

This should be a gold mine people. I’m SO SO excited to hear all your favorites!

Remember too, the goal is at least 50 responses & to help entice you I’m going to give away a $25 Sephora gift card to one commenter chosen at random. If you write a blog feel free to link up too so we all know where to find eachother!

Inspired? Share the Love...
Share on Facebook
Facebook
Tweet about this on Twitter
Twitter
Pin on Pinterest
Pinterest
Google+
Google+

{ }

“Lite” Chicken Marsala

by Natasha on August 9, 2012 in dinner 101

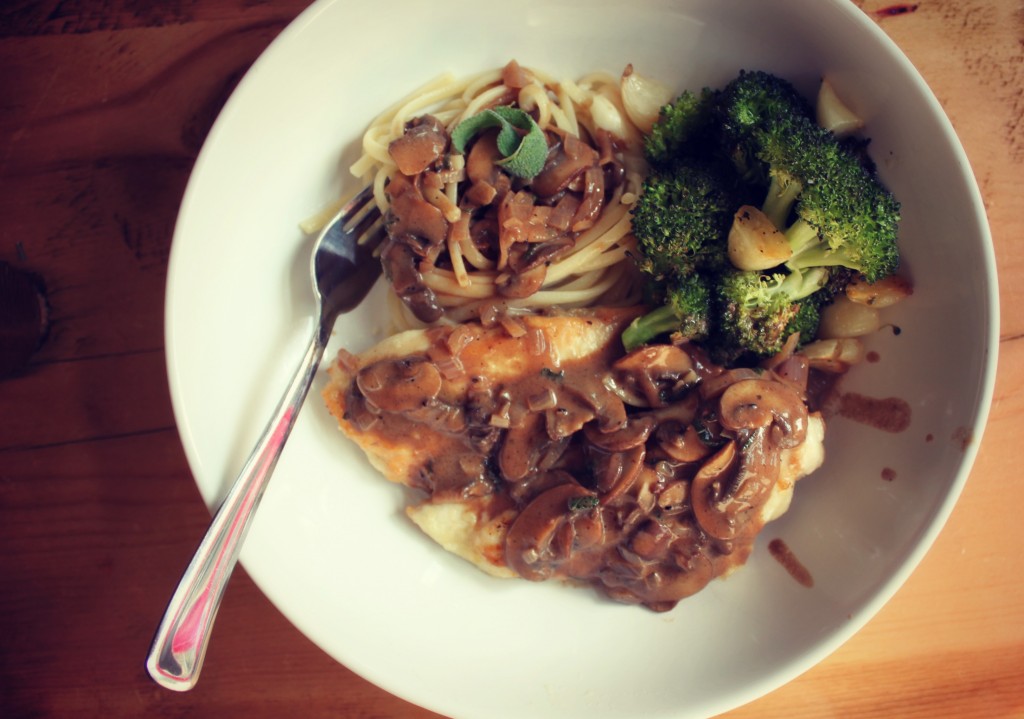
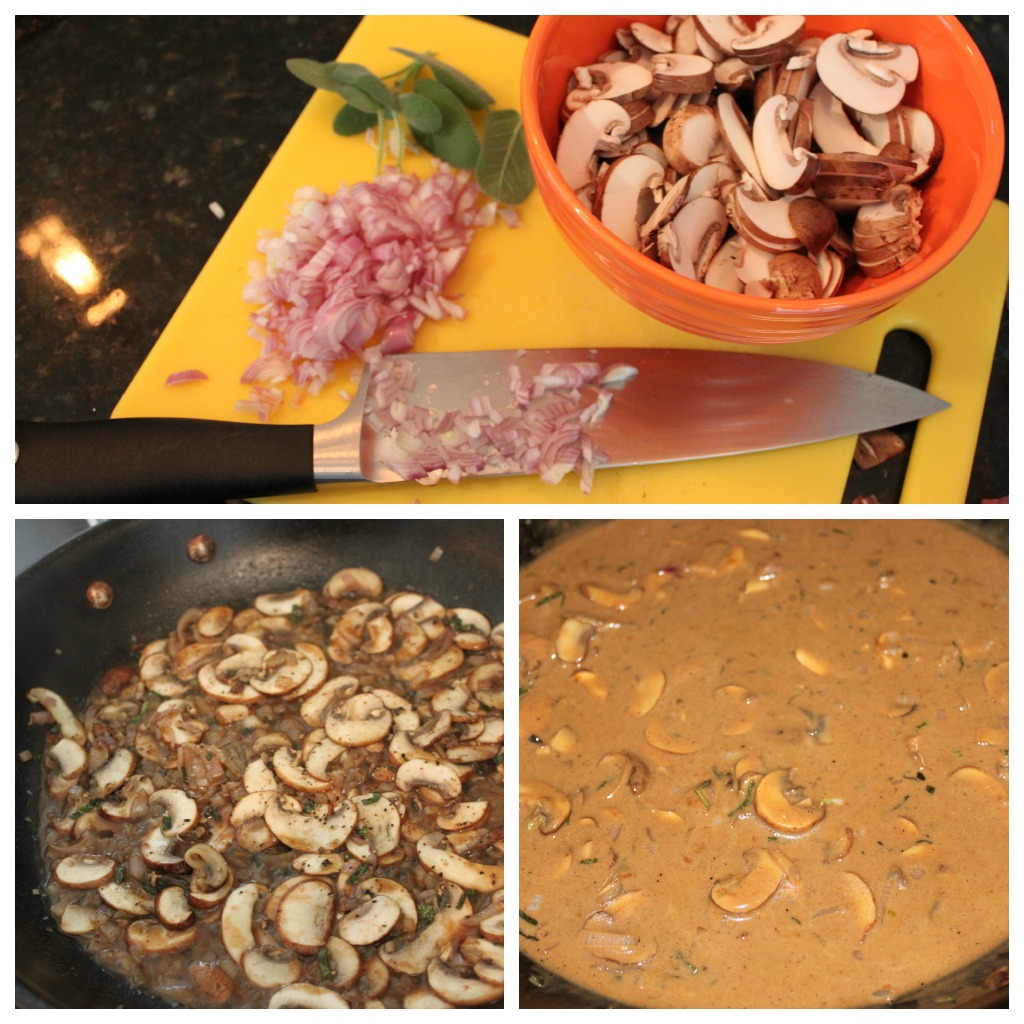
Welll, it’s not exactly low-fat but it is less calories than the regular Chicken Marsala. Perhaps we should call it “lighter” Chicken Marsala…This is one of my go-to favorite recipes. Year round it’s always good, the sage is earthy while the wine sauce is light & sweet. Just the perfect balance & it’s not too much work. Basically a great “nice dinner” recipe to have in your backpocket.And Sophie Monster’s a fan…that’s always nice.Chicken Marsala with Sage via MS Living

  • 2 tablespoons all-purpose flour
  • Coarse salt and ground pepper
  • 4 boneless, skinless chicken breast halves, (6 to 8 ounces each)
  • 1 tablespoon olive oil
  • 10 ounces cremini mushrooms, trimmed and thinly sliced
  • 1 shallot, minced
  • 1 tablespoon finely chopped fresh sage, plus more for garnish
  • 1/2 cup sweet Marsala wine
  • 1/4 cup half & half
  • 1 tablespoon butter

Directions

  1. Place flour in a shallow bowl; season generously with salt and pepper. Dredge each piece of chicken in flour, shaking off excess.
  2. In a large skillet, heat oil over medium. Add chicken, and cook until golden on the outside and opaque throughout, 8 to 10 minutes per side. Transfer to a plate, and cover with aluminum foil to keep warm (reserve skillet).
  3. Add mushrooms, shallot, sage, and 1/4 cup water to skillet; season with salt and pepper. Cook, tossing frequently, until mushrooms are tender, 3 to 5 minutes. Add wine and cream; simmer over medium-high until slightly thickened, 3 to 5 minutes. Remove from heat, and stir in butter; season with salt and pepper.
  4. Top chicken with mushroom sauce, and garnish with sage.
Inspired? Share the Love...
Share on Facebook
Facebook
Tweet about this on Twitter
Twitter
Pin on Pinterest
Pinterest
Google+
Google+

{ }

Wedding Lyric Canvases

by Natasha on August 8, 2012 in tutorials

I have to admit, I kind of love being the go-to craft girl for my friends & family. I get that same puffed chest sense of pride that P gets when I ask him to change a car headlight bulb. When our sitter Kim asked me if I could help her replicate this pin for a friend’s wedding I quickly grabbed my toolbelt, pulled the back of my pants up & said “C’mon little lady, you’ve come to the right place.” To which she then considered leaving.

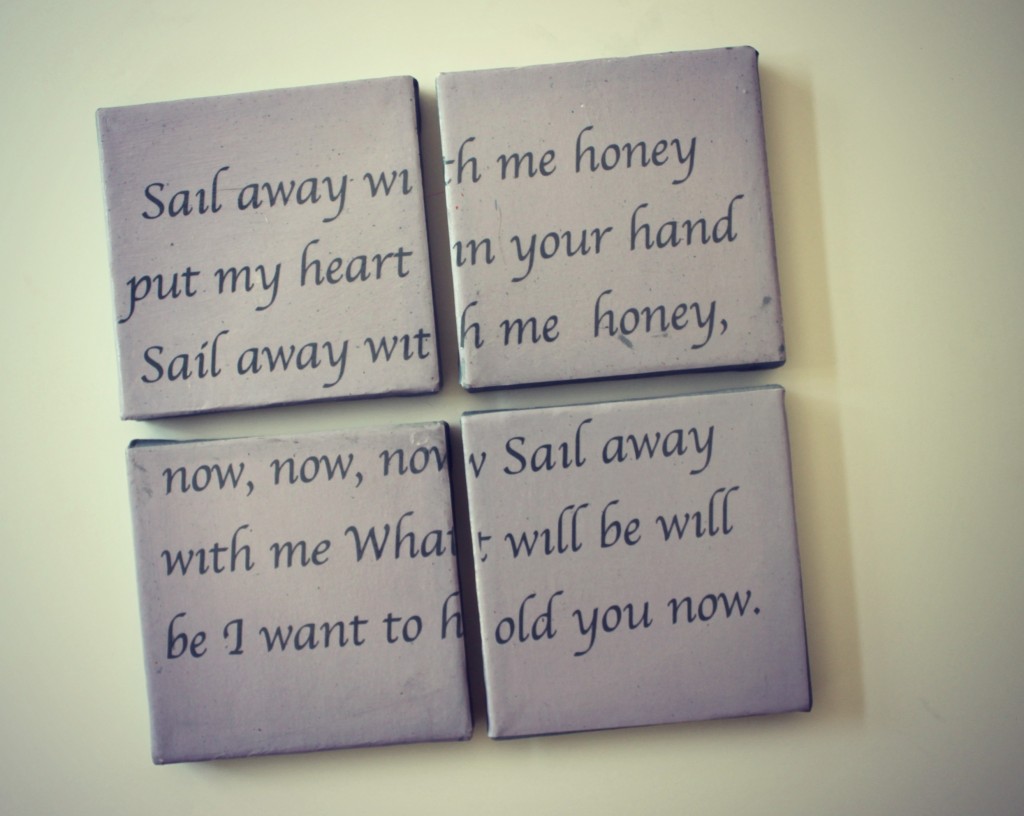
The idea is you create this lovely handmade wedding gift that creatively displays the lyrics to the couple’s first dance song. Awwww…

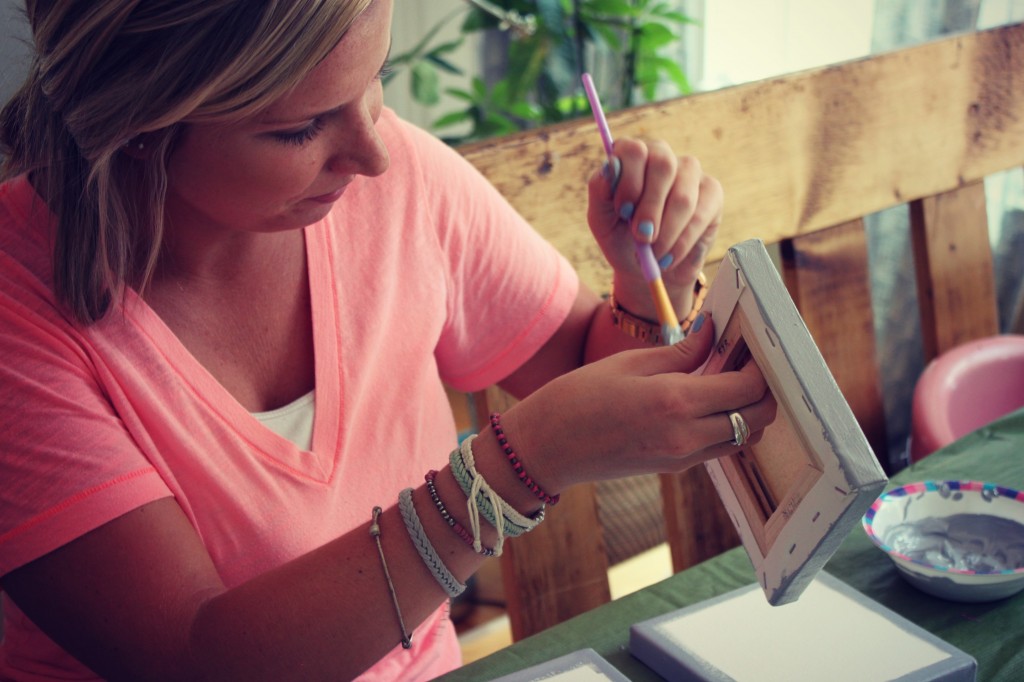
I had Kim purchase 6 small square canvases at Michael’s before heading over. (I believe they were 6×6) She then dug through my scrapbook stash & chose a nice textured lavendar paper for the fronts of the canvas. (you only need one 12×12 sheet but it’s not a bad idea to buy 2 in case you screw up) Based on that paper we decided a moody stormy grey would be the perfect color for the sides of the canvases, a small bottle of acrylic paint was more than enough.

Using a paper cutter I sliced the 12×12 scrapbook paper into 6 4×4 squares & had Kim mod podge them onto the fronts of the canvases.

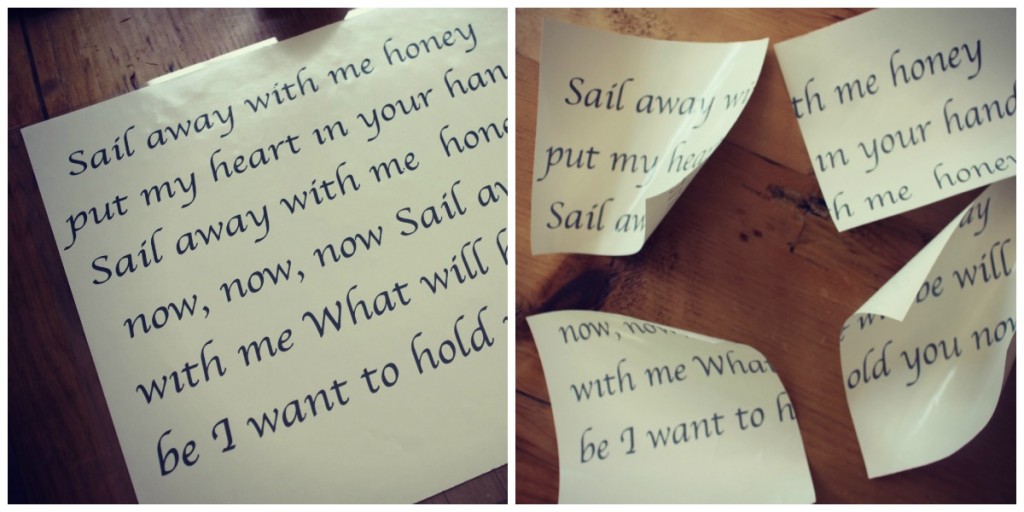
While those dried for a day I got to work figuring out the lyrics…

The original pin designed each canvas layout on their computer, then printed the pages & mod podged them to the canvases. My brain can’t even begin to visualize how the heck to lay something out in a file so that when six of them are next to one another the words on each would line up. Baaahck, makes my brain hurt. What does make sense to me is to use my Silhouette to print out the lyrics on a 12 x 12 sheet of vinyl, slice the vinyl sheet into 6 4×4 squares (I cut right through the words) & then apply them to the front of each canvas.I sure hope the bride liked them! That is if Kim didn’t decide to keep them & hang them in her room. She was very proud of her handiwork. I suppose that would be awkward decor for a single gal though, imagine a guy reading that above the bed the first time he comes over!

Inspired? Share the Love...
Share on Facebook
Facebook
Tweet about this on Twitter
Twitter
Pin on Pinterest
Pinterest
Google+
Google+

{ }

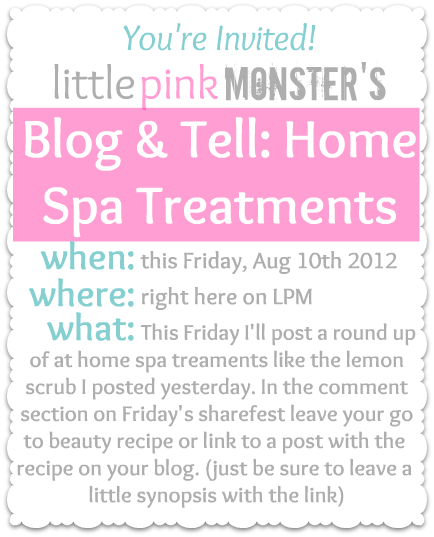
You’re Invited to Blog & Tell!

by Natasha on August 6, 2012 in blog & tell

Yesterday Lauren left a comment on my Lemon Cake Sugar Scrub post that got me thinking…

She shared a great recipe for a homemade coffee scrub & it made me think that there’s a good chance every one of us has some secret DIY beauty product or treatment that we swear by. {Think fruit mask, home cure for dry cuticles, mayonaisse hair masks…}

Sooo….

This Friday why don’t we all share the love! Like I said in the invite, I’ll spend way too much time searching Pinterest do some extensive research throughout the week & will find you my Top 5 homemade beauty treatments, then on Friday I’ll post those & you guys can each either comment with yours or link to your post on the product/treatment/recipe. Anything goes as long as it can be considered a beauty item or remedy AND you have to make it yourself. No repackaging Aveda’s olive oil hair treatment. How fun, it’s like internet show & tell! Also just to keep things a smidge exciting I’ll also throw in a $25 Sephora giftcard to be given randomly to one commenter on Friday’s post.

I’m going to (hesitatingly) set a goal that at least 50 of you will have something to share on Friday. Don’t leave me hanging here ok peeps? If I don’t get 50 I’m going to pout. And withhold the final bunny video from you! Ha! Now you’re stuck!

Seriously though, it’ll be fun. And no, the buns won’t be harmed…or will they?

Inspired? Share the Love...
Share on Facebook
Facebook
Tweet about this on Twitter
Twitter
Pin on Pinterest
Pinterest
Google+
Google+

{ }

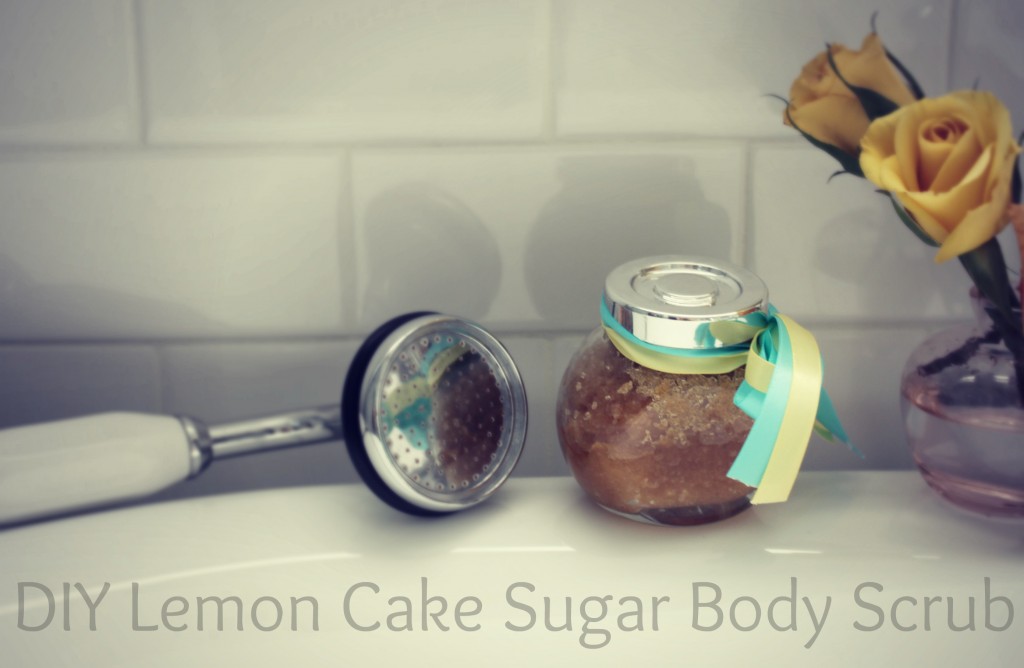
DIY Lemon Cake Body Scrub- a recipe

by Natasha on August 6, 2012 in tutorials

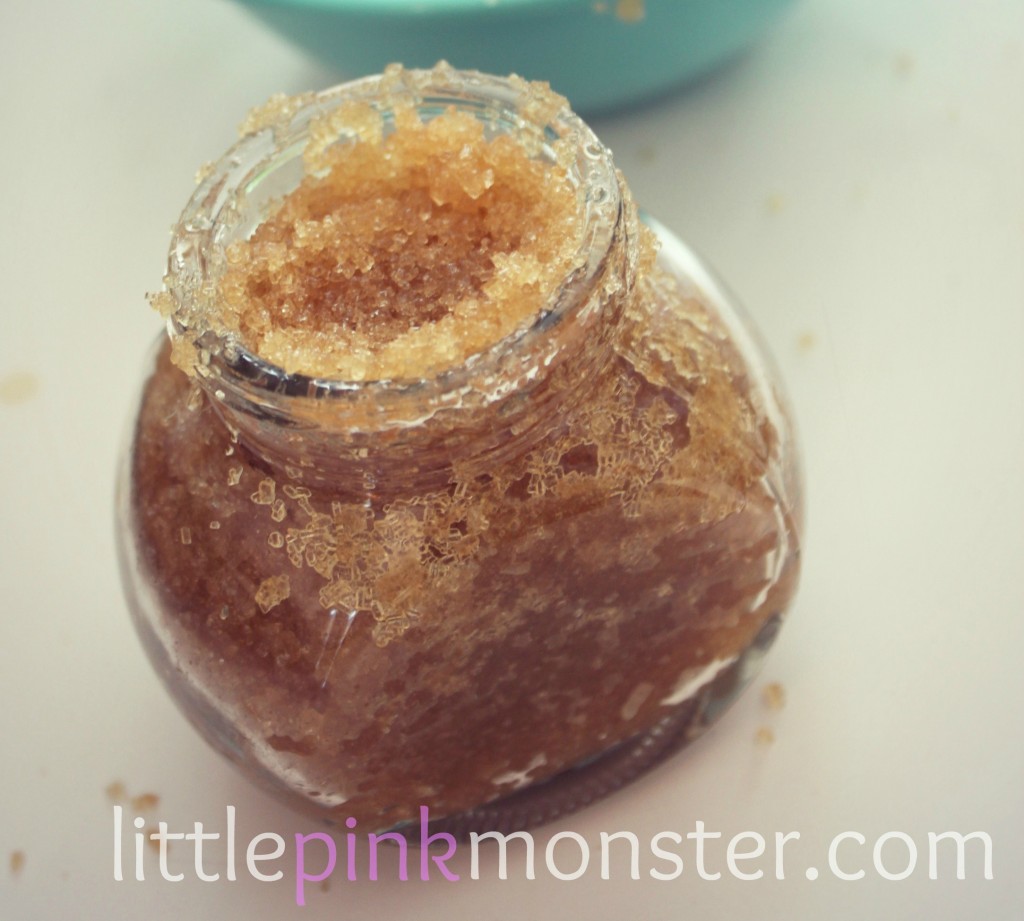
My dear friend Stacy just moved into a new house & we decided to meet at her new place before our girl’s night out last night. Thankfully, I knew of the perfect last minute housewarming gift.

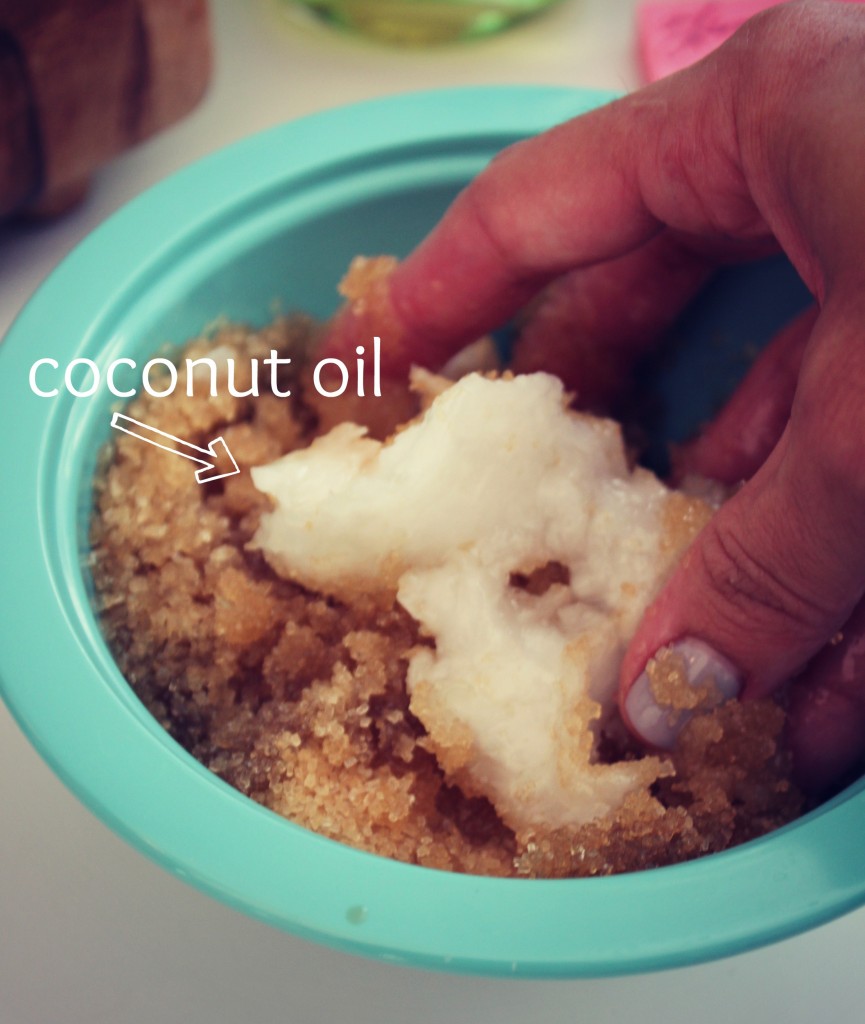
Chances are you have everything you need to make a homemade body scrub in your pantry already. For this one I used raw sugar but in the past I’ve used brown sugar, sea salt or kosher salt. I think the raw sugar is going to be my new go to though, I really love how it makes a nice firm, get that nasty flaky old scaly skin right off scrub. Super fine body scrubs anger me. I’m like seriously? Do you know how rare it is that I have the time to EXFOLIATE? And now I open the jar & it’s as scrubby as an old washcloth?? IN-furiating. I want a scrub that means business.

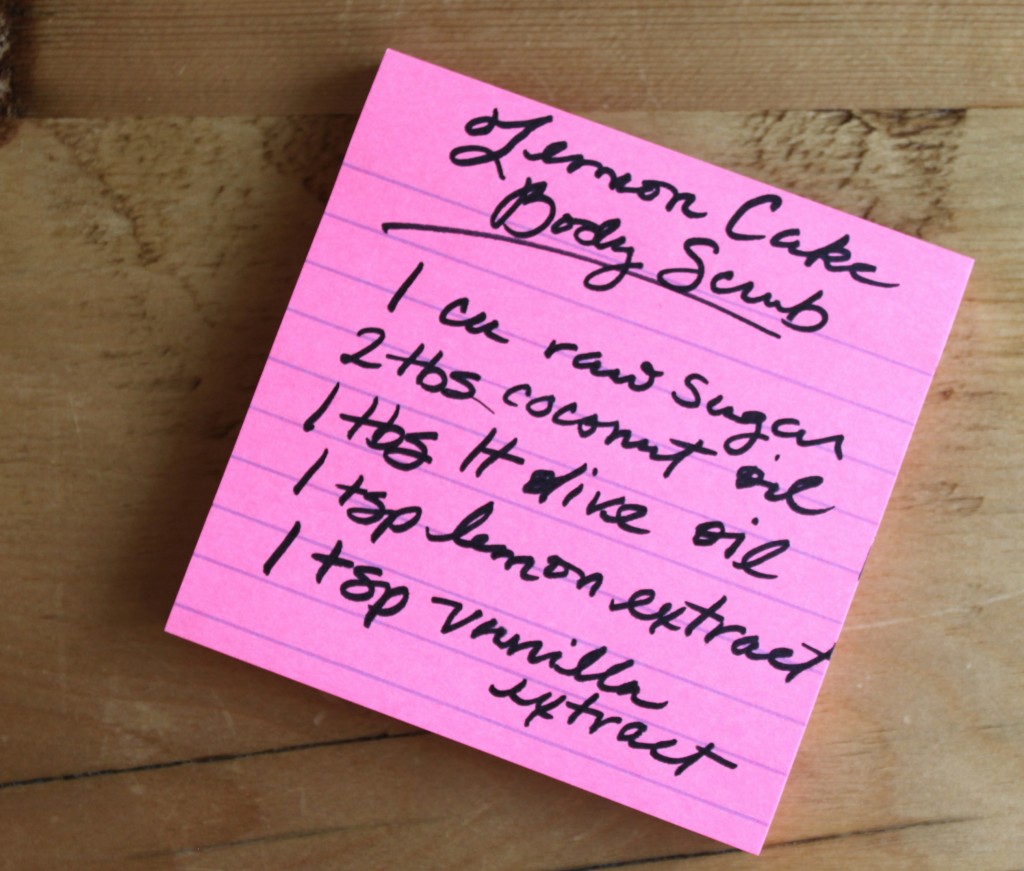
It’s not all rough & tough though, lemon extract & vanilla extract smell like baked goods heaven. I’ve also used vanilla with almond or even a splash of peppermint extract for holiday presents. Essential oils such as chamomile, rosemary, lavender or rose make a great herbal scrub. As for the oil I love the scent & lusciousness coconut oil brings but you could always just use olive or whatever you have on hand. (my pink post-it recipe above calls for 1 tbs of “lt olive oil”, that means “light”…extra virgin can smell a bit too strong for my taste)

Basically oil+salt or sugar+scent= Body Scrub.

Mix all your ingredients well & then toss it in a pretty jar with some ribbon & call yourself Suzy Freakin’ Homemaker. Just don’t forget to make a little extra to keep for yourself.

Have you ever made homemade body scrub before?


Want More Scrubby Goodness? Check out my post on personalized Mother’s Day scrubs here.

Inspired? Share the Love...
Share on Facebook
Facebook
Tweet about this on Twitter
Twitter
Pin on Pinterest
Pinterest
Google+
Google+

{ }

Next Entries →
← Previous Entries

greeting

phone pic

LTL button

before after 

buttonbirthday buttonfamily dinner buttonmommy thoughts button

marthabadge1
Photobucket
Photobucket

Tags

beauty before/after birthday party cheater's cooking Christmas costume decorating dinner 101 DIY dress-up easy dinner fashion craft furniture gift ideas hair halloween health chats holiday home home decor instagram jewelry making kid's craft kid fashion lyme mommy blog mommy thoughts naptime crafting party pinbusters pinterest princess recipe review recipes sewing shopping sunday love thrift store finds tips & tricks toddler sewing tutorials valentines video vlog where am I?

Blogroll

  • A Beautiful Mess
  • Cancer Alliance Blog
  • Centsational Girl
  • Coco & Kelley
  • Cotton & Curls
  • Crafterhours
  • Craftiness is not Optional
  • Effortless Style Blog
  • Happy Together
  • Hi Sugarplum
  • Homemade By Jill
  • Honey We're Home
  • How Sweet It Is
  • Hyperbole & a Half
  • iHeart Organizing
  • Kristen F. Davis Designs
  • Lil Blue Boo
  • Little Green Notebook
  • Momastery
  • One Pretty Thing
  • Piccoli Piselli
  • PS- I made this
  • Skirt as Top
  • Smitten Kitchen
  • That's So Michelle
  • The Baking Robot
  • The Daybook
  • The Makerista
  • Victoria Elizabeth Barnes
  • Vintage Revivals
  • Young House Love

WordPress Admin