I know what you’re thinking…buying lumber, using a drill, large project…there’s no way I can do this. But in ALL SERIOUSNESS, this was NOT THAT HARD TO DO! I promise, and really, when have I ever lied to you before? Exactly.
So here’s how I did it…
You’ll need:
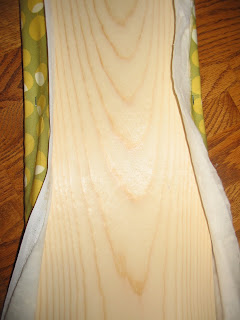
Wood, plywood or pressed wood- 3 pieces that meet the measurements of your window, you’ll want one long piece to go across the front and then two small pieces that are the same width as your long piece but only 3-4″ long. They basically need to be long enough to make your valance stick out far enough from the wall for a curtain rod to fit underneath. Mine were 77″ x 8″ & 3 1/2″ x 8″
Batting, Fabric- same measurements as wood plus a few inches to wrap it around
2 corner brackets
2 L brackets
drill,level & staple gun
1st- Buy your wood. I know lots of women hate going to the hardware store. I even still get intimidated, but really there’s no good reason to be. Take your window measurements with you and head to the lumber section. Pick out a piece of something lightweight and they’ll cut it for you right there on the spot! No questions asked, and no sawing for you. EASY. 2nd- Your going to attach your two smaller pieces to the large piece. I used corner brackets for this, just drill them right on.
3rd-Wrap your batting around 1st and staple onto wood, just like you’re covering a chair or barstool. Then repeat with the fabric. Start in the middle and work your way out being sure to pull the fabric taut as you go.
 4th- Using a level to make sure you hang it straight attach the L brackets to your valance first and then to the wall. You want it to hang so it covers your existing curtain rod. See my curtain rod bracket hiding under there?
That’s it! Replace your window rod and panels underneath your new fancy schmancy valance & enjoy!
 Only one more task to do and this nursery is officially done. I can’t wait!!
Also here’s what blog projects I have planned for this week…
-Mod Podge fabric covered bookshelf
-Glamarama Fabric Paint Onesie
-Mum Fall Painted Curtains
Happy Monday! (;


This is great! I haven't gotten my sewing machine yet (birthday present next month) and I'm into no-sew projects right now so I can get started.
I started doing a room makeover for Phoenix in MARCH and it's still not done! But curtains are next on the list and I love this. I especially like mixing patterns!
Thanks!
Loving the valance. The fabric is so cute! I also absolutely love the pink and green together. I'm almost done with my 2 year olds room. I just need to finish the bedskirt and get some vinyl lettering done!
I love it! It turned out so cute and makes me want to finish my girls rooms (okay more like start).
Sam's room is adorable! I love it! Great job on the valance.
LOVE that! And can't wait to see the Podged bookshelf. . . 😀
You do such a great job on your projects – and it's so nice seeing things I can both do and afford! I can't wait until the bookshelf!
i LOVE it! looks awesome! the fabric is so cute too, did it end up working with the other colors? anyways, great joB!
Love it! I made one of these once….it was for our master bedroom and covered in toile which made my husband so mad because he HATES toile….but I love it and I win 😉 I love the fabric you used….and the nursery is just gorgeous! So peaceful and happy!