I decided to try out a new hairstyle for my hot anniversary date night, so hot it ended with a whiney 4 year old insisting on being in our bed right smack in between us, but the hair, the hair. was. awesome. 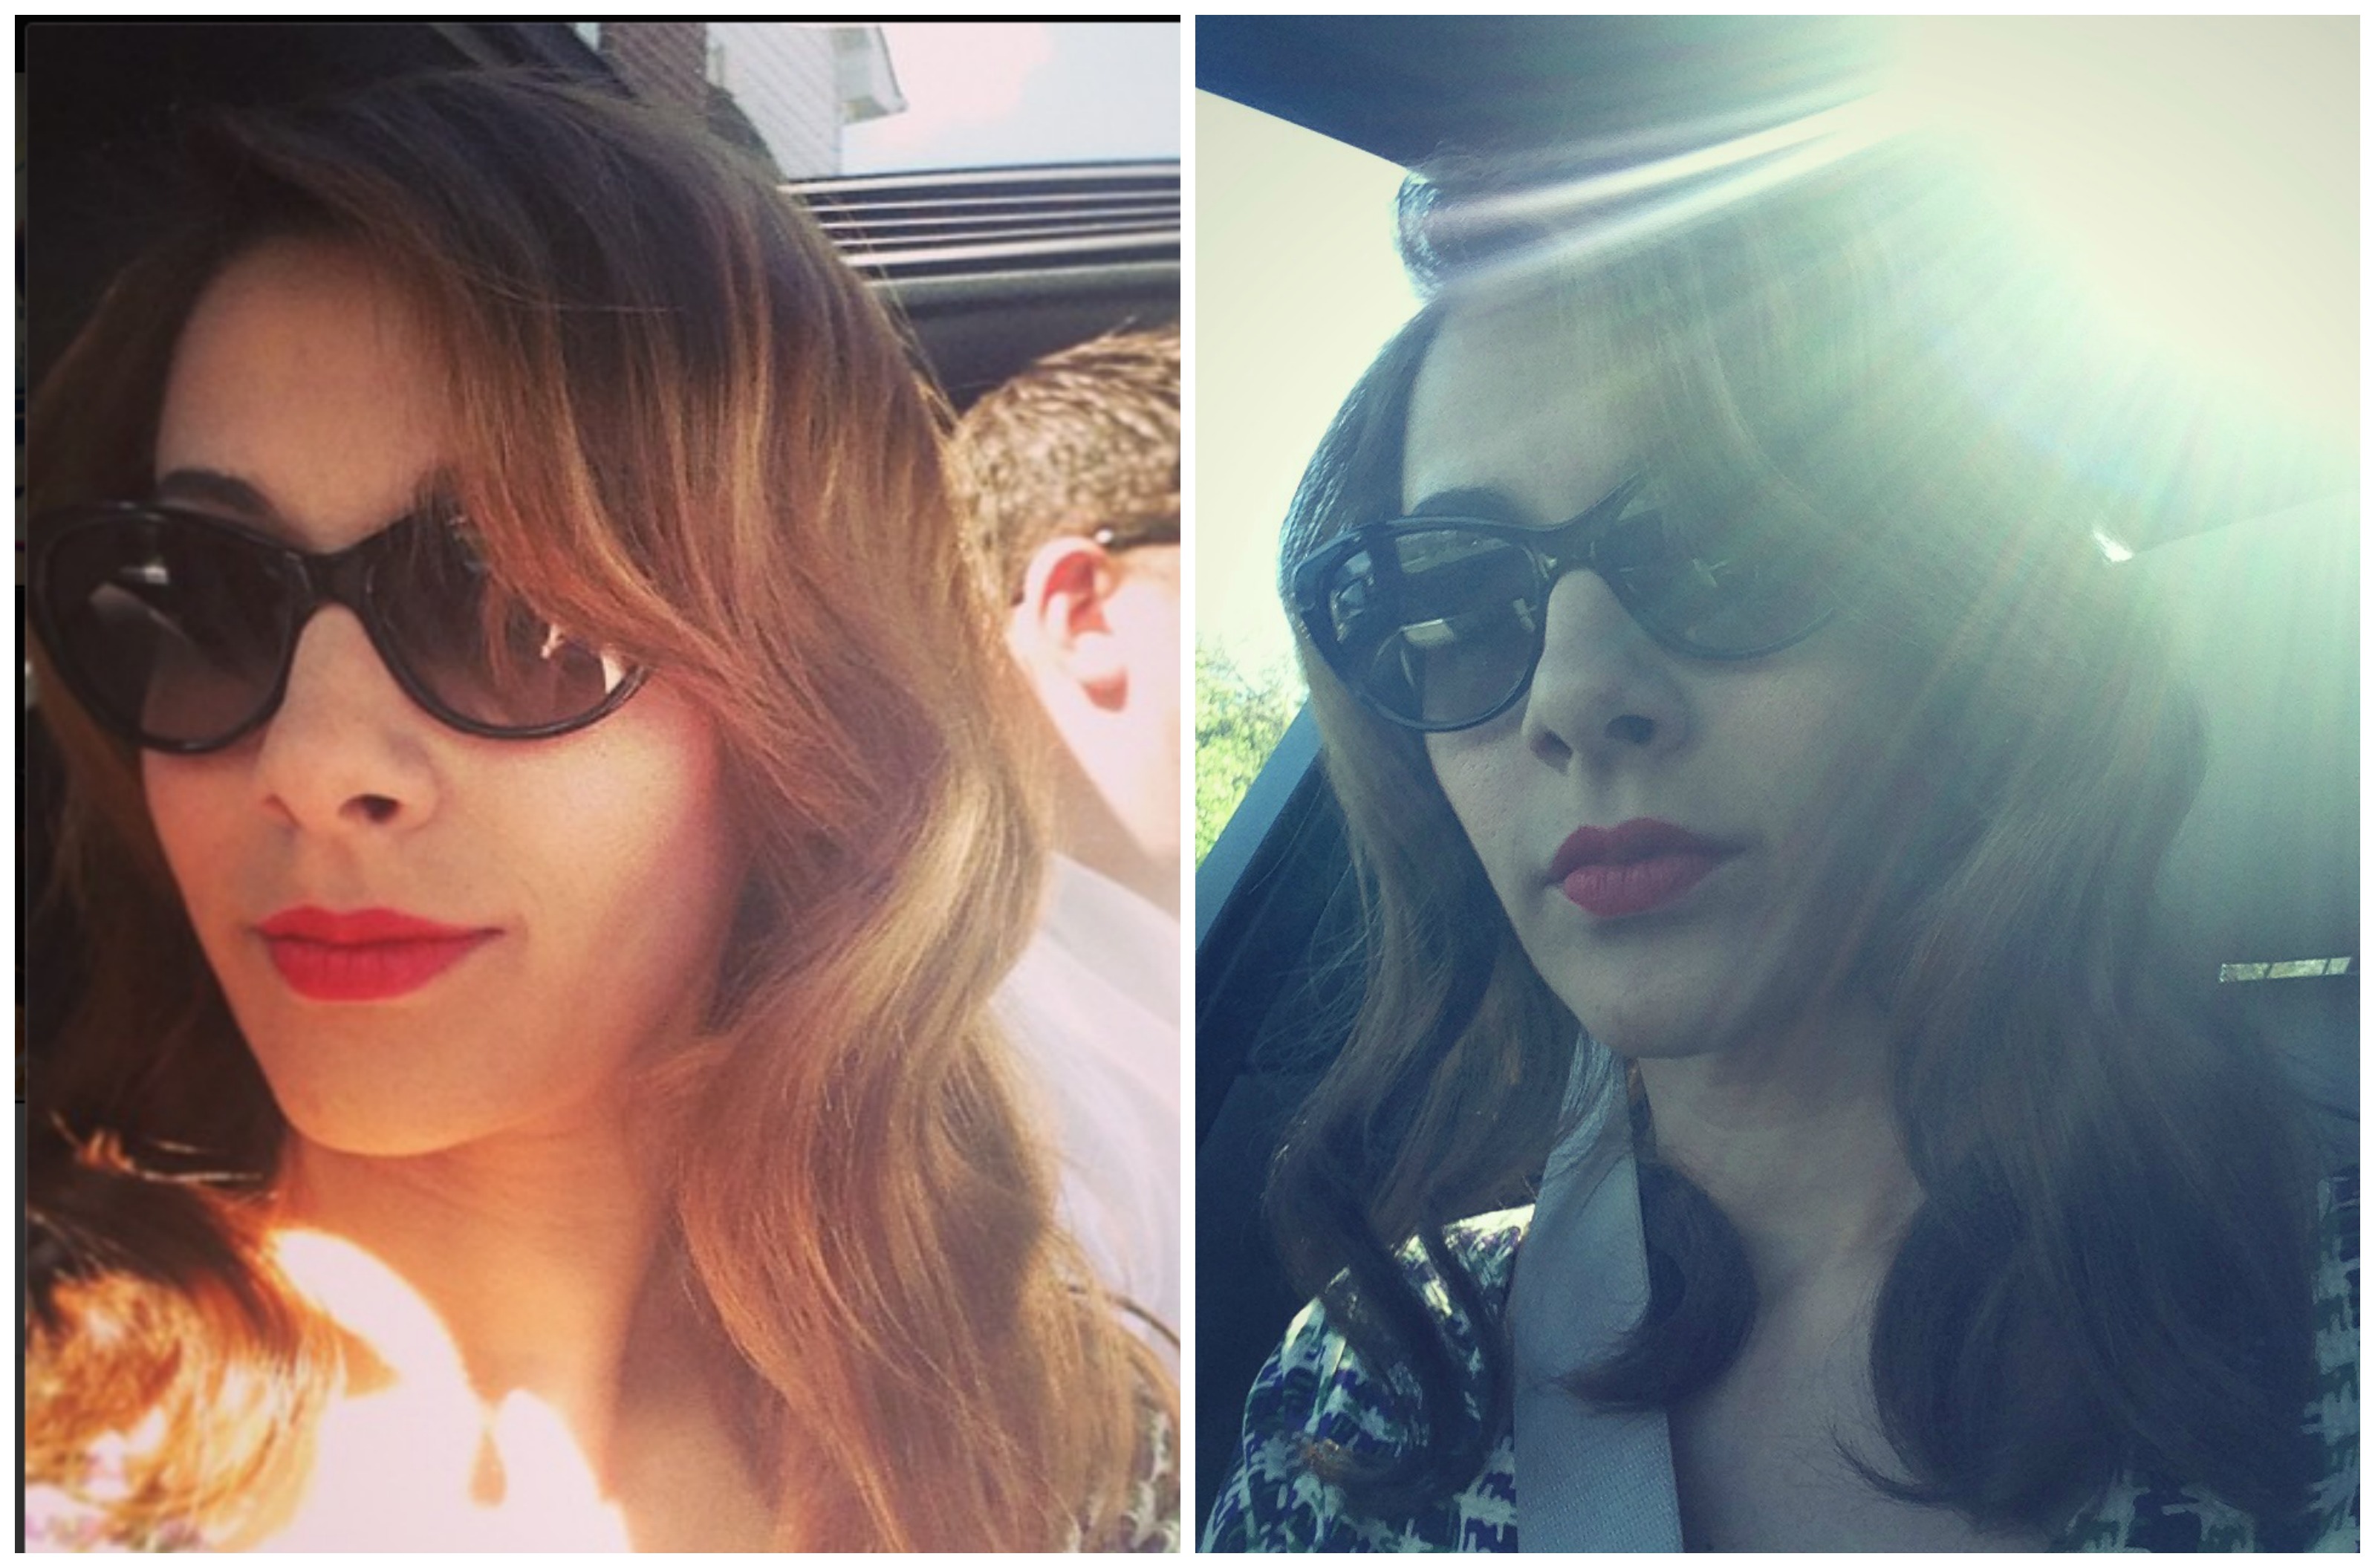
It’s based on the iconic ‘peekaboo hair’ made famous by Veronica Lake in the 1940’s…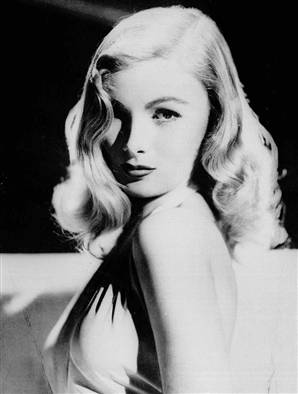
The best part is, of course, the fantastic retro style it evokes but it’s also surprisingly easy to do! From wet hair to completely finished in 25 minutes tops. I didn’t take any pictures while I was styling mine but just had to share the ‘how-to’ with you guys so I talked my friend Megan into coming over yesterday & letting me have my way with her hair. Keep in mind that this style worked out on both my hair which is thin & slightly wavy & Meg’s which is very thick, coarse & wavy.
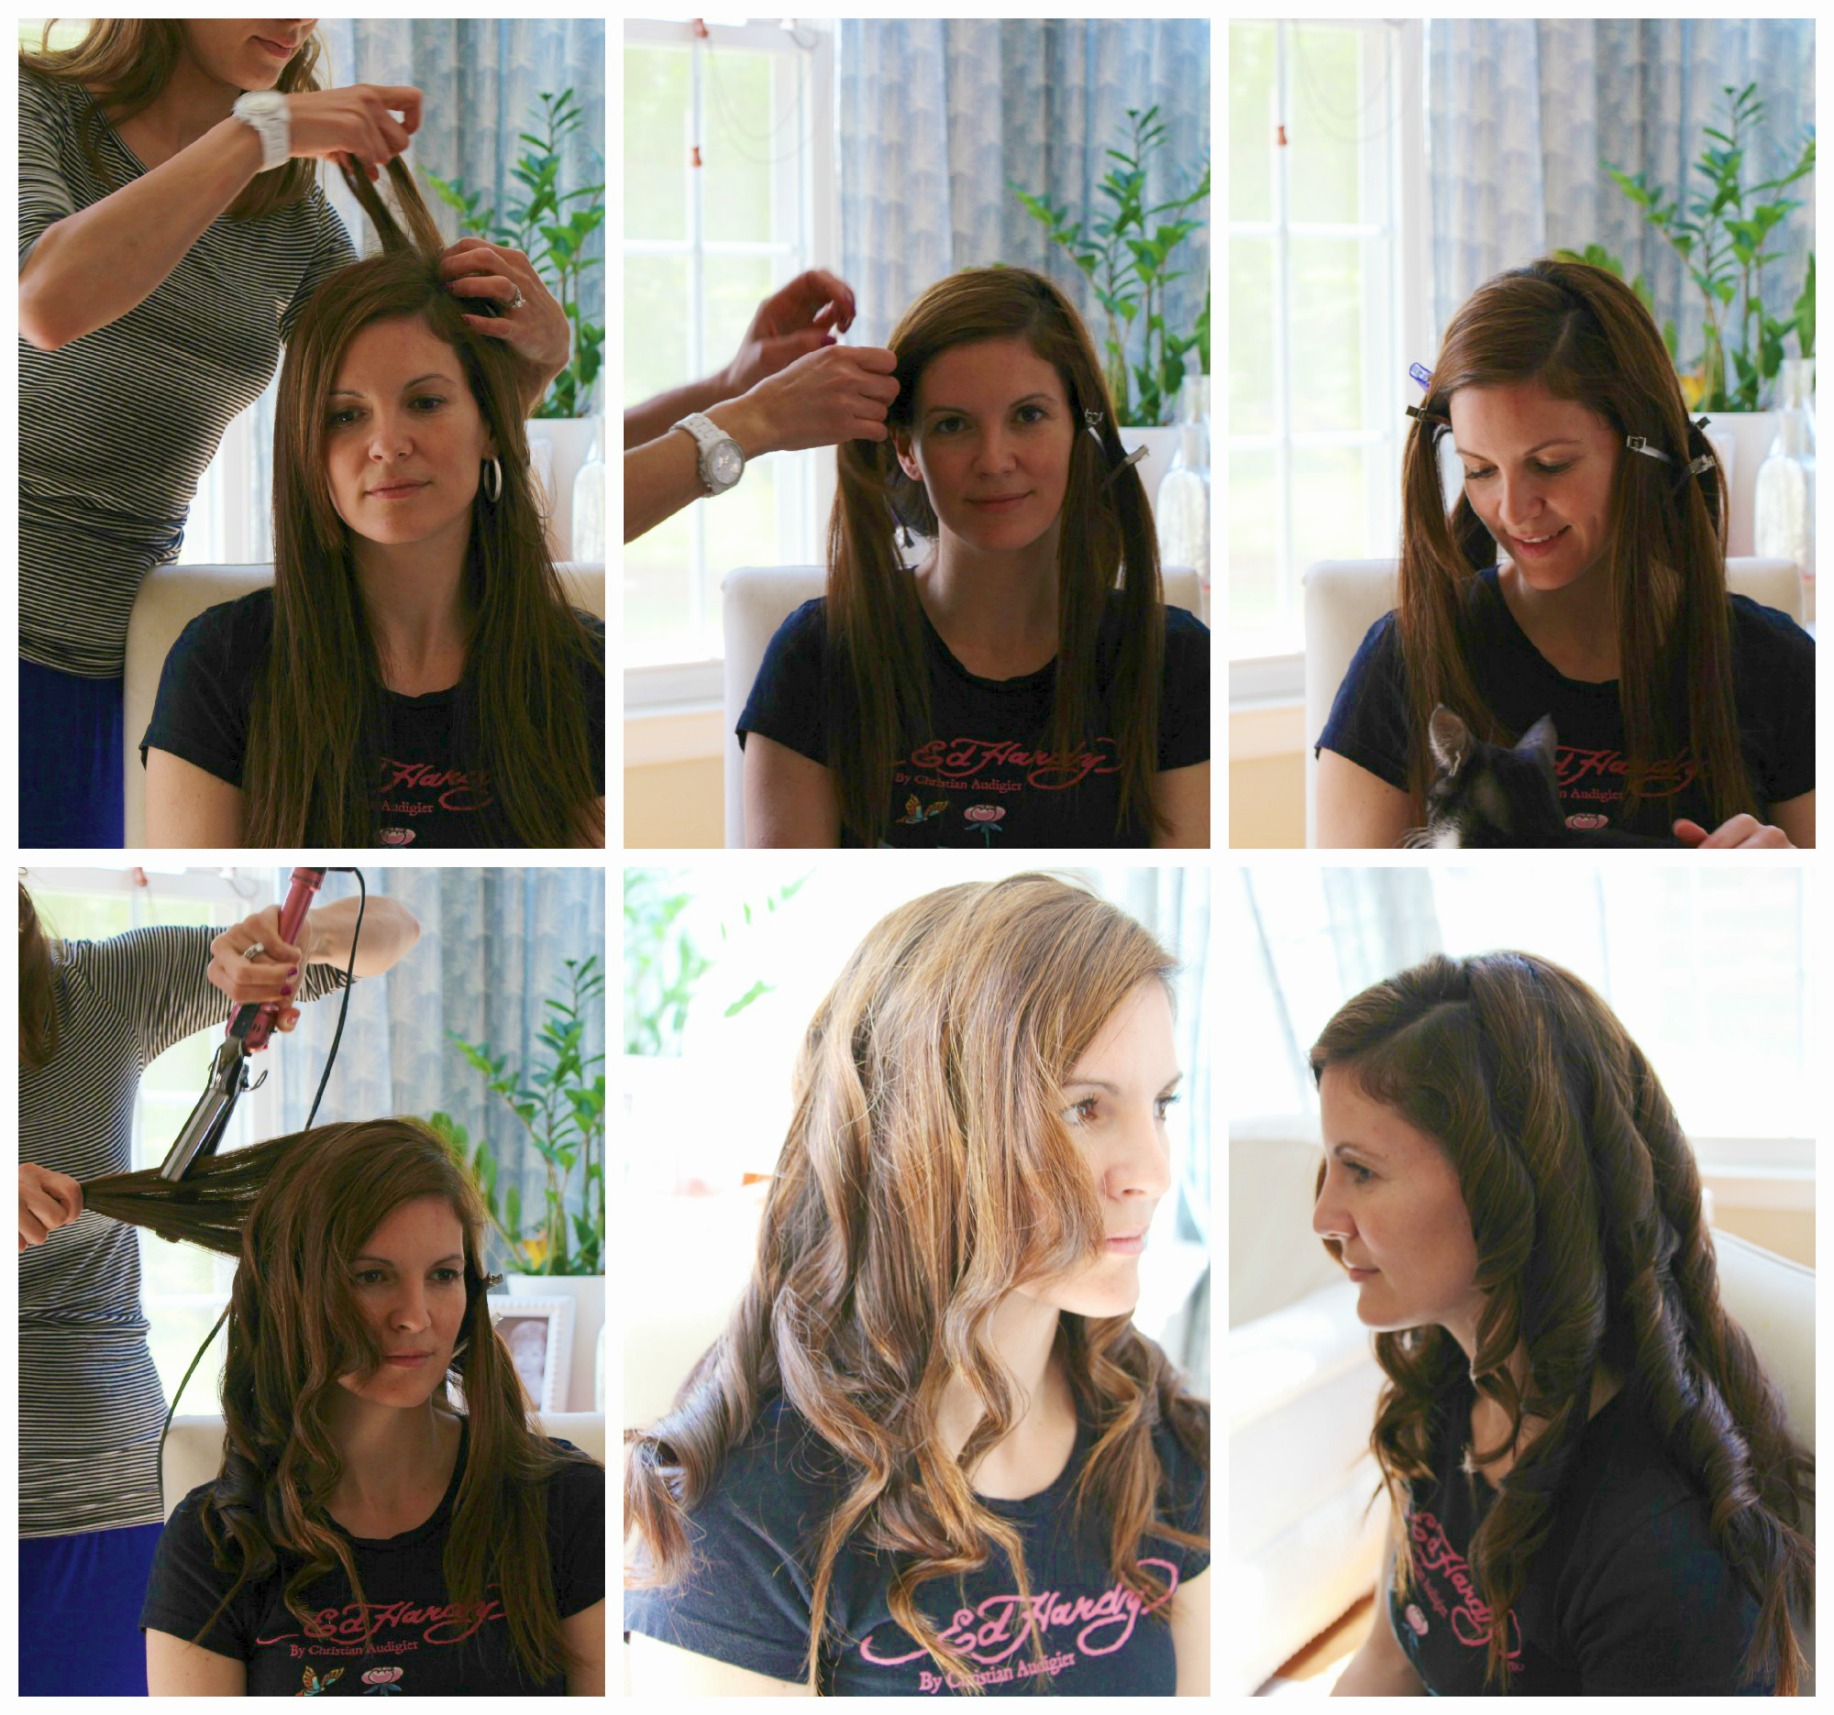
- First step is to part your hair with a deep side part. I tend to draw an imaginary line from the outer corner of my right eye up to determine where to place my part.
- Next separate hair into 6-10 sections depending on how much hair you have.
- Beginning with the front left section take the hair & wrap it around a 1″ curling iron (I just bought this curling iron
on sale & love it!) towards your face, being sure to hold the barrel straight up & down. I left the last part of the tips uncurled. Gently release.
- Now here’s the key to this style. You want to curl each section so the curl matches the one before it. This step sounded complicated to me but once I tried it just kind of happened naturally. If you get a wonky curl just try it again. Eventually it will {should} behave!
- As you go spray each curl like a BAWSE! I’m a complete loyalist to this hairspray
, it has great hold but you can still brush your hair & keep it soft to the touch. And I always get compliments on how good I smell when I use it, it’s a good little secret that it’s actually my hairspray, shhh…
- Continue on the right side once again curling each section towards you face. The last picture is a great visual of what it looks like to have all the curls line up, this is what will make the beautiful wave in the final style.
- The last step is to brush each curl. Yep, I said BRUSH YOUR CURLS. Start off gently, I use this hairbrush
(which is also great for tangle-sensitive little heads) & starting on the left side gently brush it out from the inside. JUST KEEP BRUSHING until you start to see that iconic wave start to form. I found that I could actually use my hands to shape each section, especially the most important ‘peek-a-boo’ wave by your face. Once you get it the way you like spray, spray, spray the heck out of it.
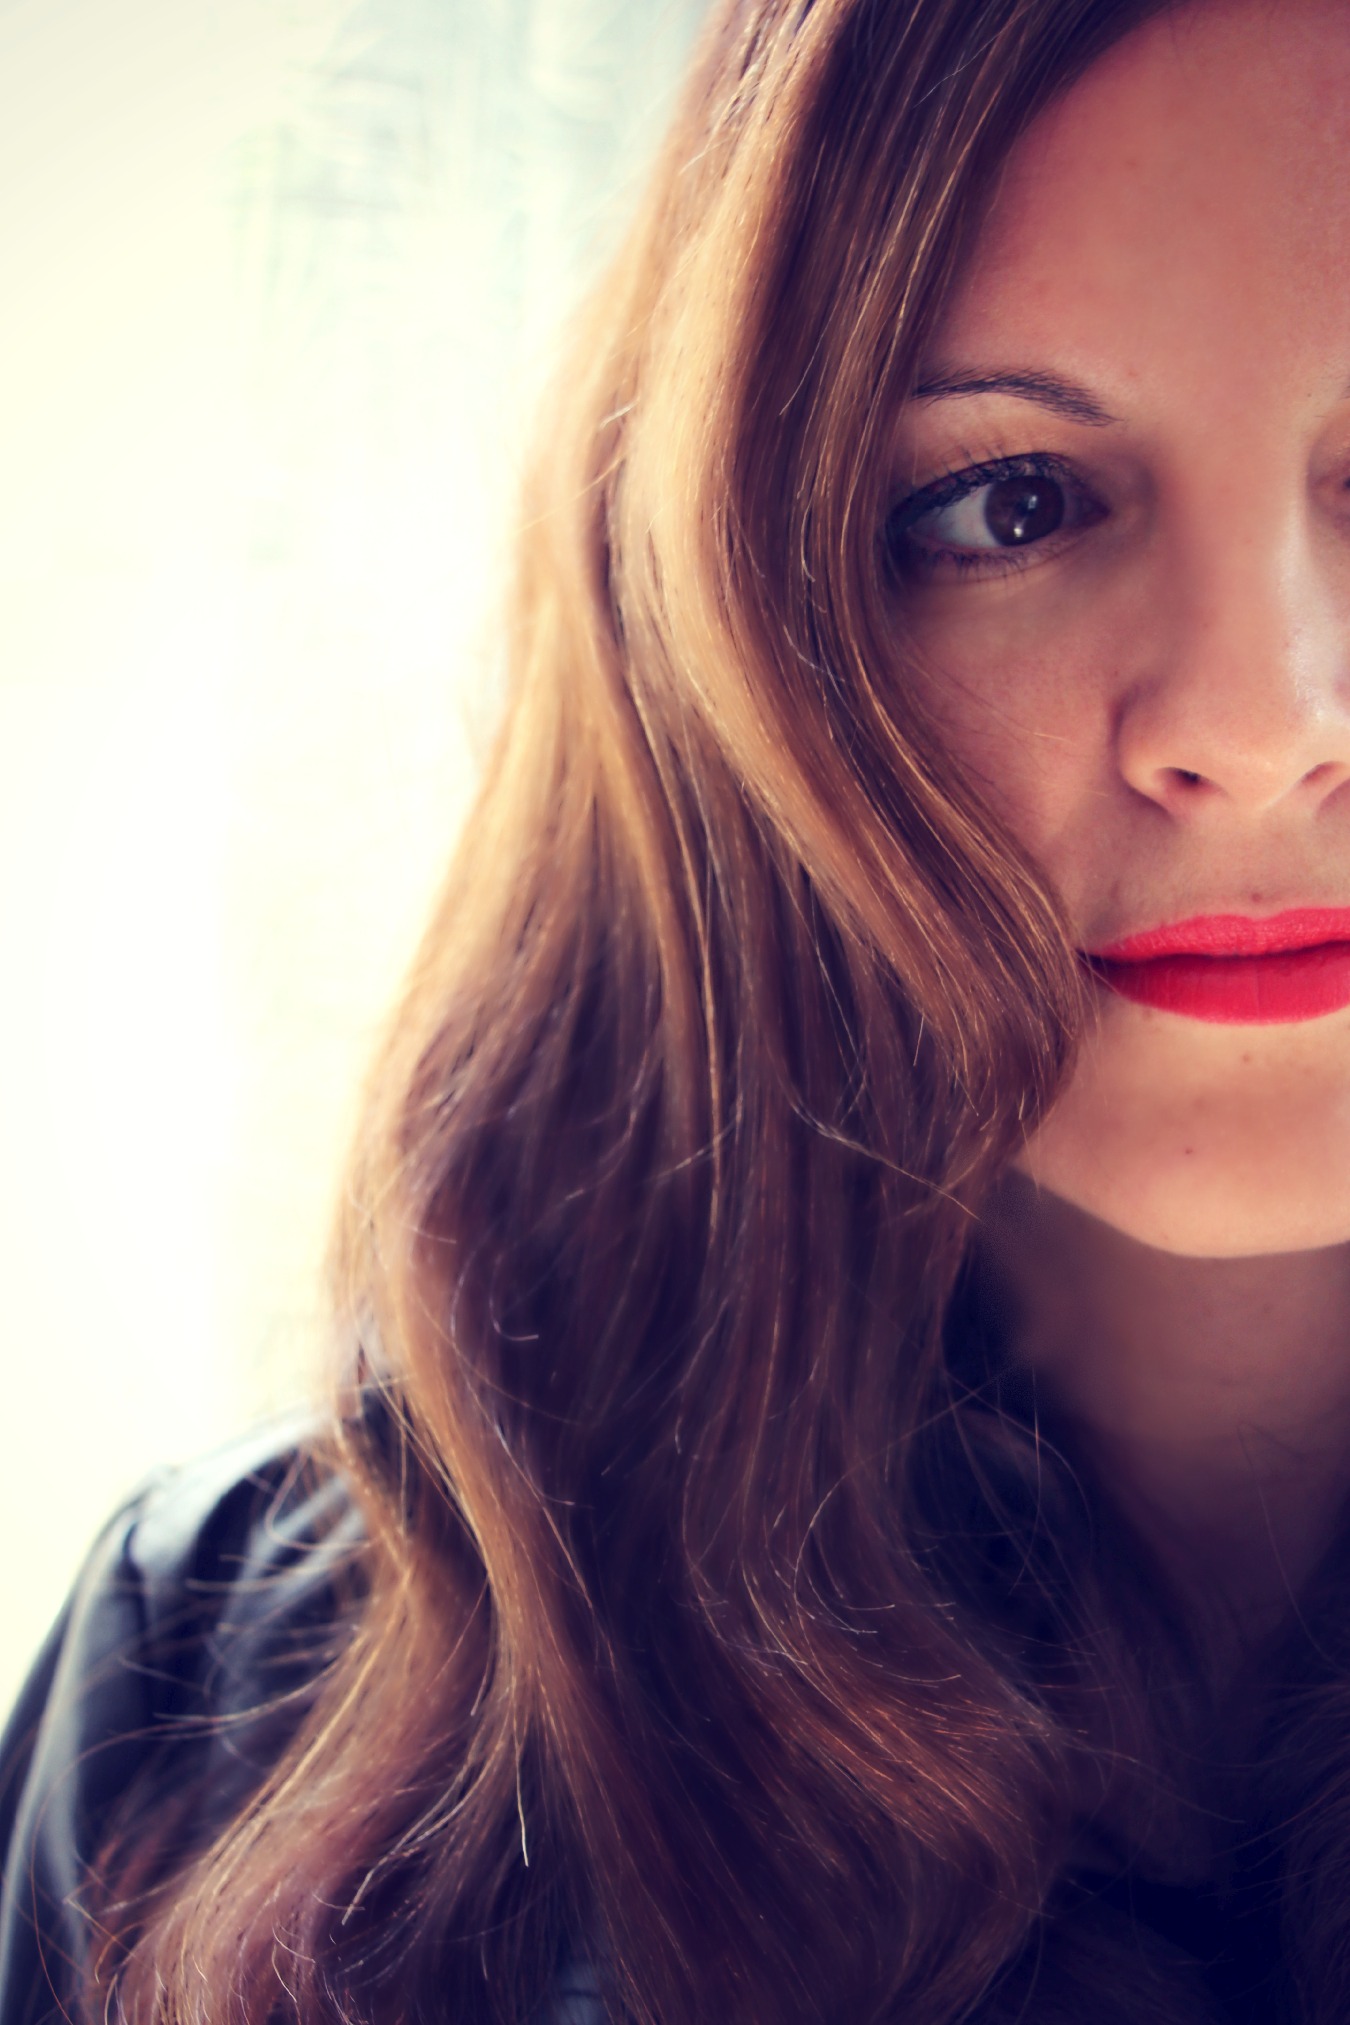
That’s it! Sooooo, think you’ll try it?? Anyone else obsessed with rockin’ it retro style?


Love this, lady! Question: I have thin hair as well, how hot do you put your iron setting on? I feel like I have to put mine at the highest setting, but don’t curl my hair a lot due to feeling like I’m frying my head.
Yeah, I’ve been trying to figure that out too.This new one I got has degrees on the knob & I’ve found that around 375 works for me, have you tried any of the heat safe sprays? Might help relieve your hair frying fear (:
Love it! Question, I also have super thick, coarse hair. How long did her ‘waves’ stay. I have the worst luck, it looks great for about an hour and then – nothing! Even my wedding hair with almost 2 cans of hair spray was flat by the end of the night.
I know they at least stayed a few hours, her hair does hold a curl pretty well though…I say go for it!
I’m pretty convinced you could pull off looking gorgeous with a bald head :)! I might have to try this over the weekend though, your step by step instructions were awesome!
Ok you totally just made my day (:
This is definitely one of those celebrity hairstyles that is made to look effortless but requires time, technique, and lots of hair spray to do. You make it look great Natasha!
Thanks! It really wasn’t that hard to do though, I swear!
You look so glam! Love it, I’ll have to give it a try really soon.